Overview
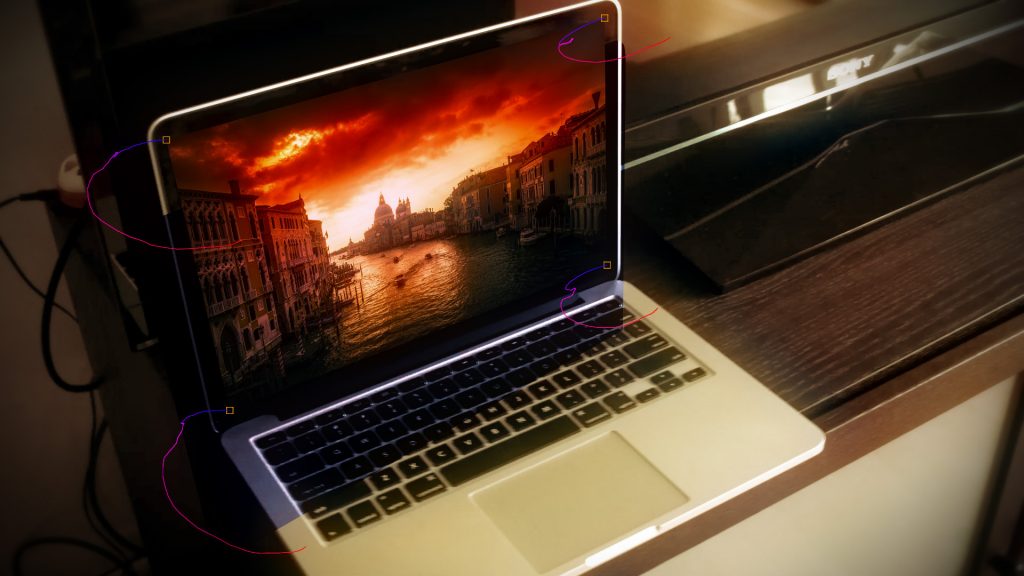
The Corner Pin Studio is our next generation of corner pinning and simplifies the work of creating corner pin inserts, with a single Mocha planar tracker to track the target surface and 4 offset pins to accurately position the source shot onto the target. As well as source crop and feather options, there is an additional source pin option to more easily position the pinned surface over the target source with visual on-screen guides. The Corner Pin Studio filter includes several post processing options for foreground color correction, edge chokes, drop shadow, light wrap and 27 unique compositing blend modes.
Function
Presets and Common Controls
BCC filters come with a library of factory installed presets plus the ability to create your own custom presets and preview them with the BCC FX Browser™.
BCC filters also include common controls that configure global effect preferences and other host-specific effect settings. For more information about working with presets and other common controls, Click Here.
Workflow
Host Specific Workflows
Corner Pin Studio is a unique and powerful tool that integrates with host specific workflows to generate impressive, dynamic results. In addition to basic standard controls, the plugin works with the host specific compositing requirements. Below you will find detailed tutorials illustrating individual host workflows that integrate motion tracking and masking to track text to a wall using corner pin studio.
Adobe After Effects
Adobe Premiere Pro
Media Composer
Vegas Pro 17
Resolve
CommonWorkflow Settings
- Apply to Foreground is a unique workflow that allows you to apply the corner pin to the foreground image.
- Apply to Background is the most typical workflow for Corner Pin Studio. In this mode, your chosen source image will be pinned over the background. When selecting this mode, mocha motion tracker will use your background source for all motion tracking.
Background/Foreground Layer: Contextual controls determined my the chosen workflow mode. These controls tell Corner Pin Studio what source image to use for the corner pin. After Effects users can use a host native dropdown to select the layer for the background or foreground layer. Media Composer users can simply select the filter layer or first below, while OFX users can select their source A or B layer.
Show Background/Foreground will bring the background/foreground to the front, allowing you to view the background/foreground independently of any corner pin effect.
Composite Over BG: Composites the foreground image over the background. Enabling this will alow adjustments to the Apply Mode in the Composite Group.
Corner Pins Group
The Corner Pins Group provides access to the four pins used to map the foreground image. You can manually adjust the position of the Top Left, Top Right, Bottom Left, and Bottom Right pins, or, more commonly, you can use the Mocha Motion Tracker to track the movement of the corner pin in the scene.
Transforms Group
The Transforms Group allows you to offset the position of the corner pin, adjusting it’s translation, scale, rotation and skew.
Translate X/Y: Sets the position of the corner pin on the X or Y axis.
Master Scale: Sets the scale along the XY axis.
Scale X/Y: Sets scale individually along the X or Y axis.
Rotation: Rotates the corner pin.
Skew X/Y: Skews the perspective of the Corner Pin along the X or Y axis.
Source Pins/Crop Group
Source Pins adjust the locations in the foreground image that get mapped to the pinpoints. Typically they do not need to be adjusted, however, in certain circumstances where you want to set the pin to an area other than the corner of the image (for example if you are pinning a logo, or an arrow), you can manually adjust the location of they source pins. This is also good if you want to select a specific region of the image to crop.
Crop to Source Pins enables crop for the corner pin layer, cropping the corner pin to the location of the source pins.
Edge Choke adjusts the choke along the edge of the crop. higher values will increase the amount of choke.
Edge Choke Softness adjusts the edge softness. Higher values will create more edge feathering, while lower values will create a sharper edge.
Edge Choke Falloff adjusts the gradient of the feathering.
Render Group
Motion Blur allows you to enable motion blur for the scene. After Effects users have an additional option available which allows them to use the host’s built in motion blur controls. When motion blur is enabled in any host, the following controls become available:
Blur Samples sets the number of motion blur itterations. Higher values will produce more samples, resulting in a smoother, more continuous blur.
Shutter Angle adjusts the speed of the “camera” shutter. Smaller values will result in a shorter range of motion blur, while larger values will create a wider blur.
Shutter Phase shifts the relative point in time in which the blur samples are created. Sample can be either generated from the previous or upcoming frame. By adjusting the Shutter Phase, you can change the look of the blur.
Upsampling Method sets the quality of the render. There are a number of options to adjust the speed and smoothness of the corner pin warping.
- Fast
- Sharp
- Standard
- Smooth
- Magic Smooth
- Magic Sharp
Downsampling Softness Controls the softness for scale settings where the image is being down sized from higher resolution. provides anti-aliasing to the edges of the corner pin warp. Higher values will provide softer results.
Inverse Warp inverts the corner pin distortion. Typically this is used in conjunction with the foreground workflow to allow you to unwarp a corner pin effect. An example would be if you used Corner Pin to add something to the background image.
Color Correction Group
The Color Correction group provides a range of foreground color correction tools for aid in matching foreground and background colors to create a more convincing final composite. A separate set of correction tools for just the foreground edge is found in the Edge Color Correction group.
Color Correction On: Completely enables/disables all foreground color correction.
Temperature: Control the overall temperature of the foreground. Moving the Temperature slider to the left (negative values) will yield a cooler result, while moving the slider to the right will warm up the shot.
Tint: Control the overall tint of the foreground. Moving the Tint slider to the left (negative values) will add a green tint, while moving the slider to the right will add a magenta tint.
Saturation: Control the overall saturation of the foreground.
Brightness: Control the overall brightness of the foreground.
Contrast: Control the overall contrast of the foreground.
Gamma: Control the overall gamma of the foreground.
Drop Shadow Group
Shadow On enables an animateable drops shadow on the foreground image
Shadow Distance sets the distance (in pixels) between the shadow and the image.
Shadow Intensity sets the opacity of the drop shadow, scaled as a percentage. At a value of 100, the shadow is completely opaque. Lower Shadow Intensity values make the background visible through the shadow. At a value of 0, the shadow is completely invisible.
Shadow Angle sets the direction of the drop shadow. A setting of 0° places the shadow to the right of the image; a setting of 90° places it directly below the image.
Shadow Softness controls the softness of the edges of the shadows. A setting of 0 produces a sharply defined shadow with hard edges. Increasing Shadow Softness produces shadows with softer edges.
Shadow Color sets the color of the shadow.
Light Wrap group
The Light Wrap parameters reflects the background image around the edges of the corner pin image to form a border. This creates the illusion that light from the background is reflected onto the foreground. This creates a more convincing composite by making it appear as if the images were shot in the same environment.
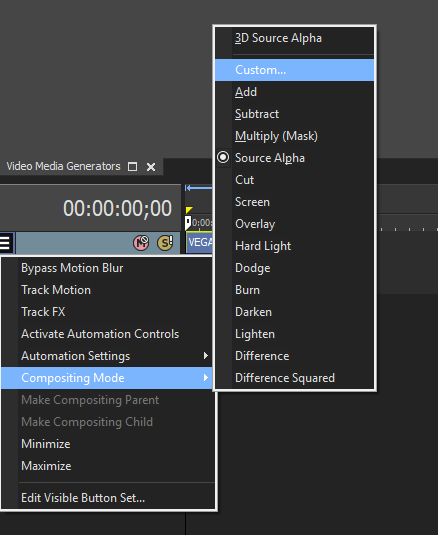
Vegas Pro Workflow Tip: To use the Light Wrap feature in Vegas Pro you must apply the filter in Custom Composite Mode. For more information on working with Custom Composite Modes in Vegas, Click Here.

Using Custom Composites in Vegas Pro
Light Wrap On: Enable/Disable the Light Wrap pass.
Lightness: Sets the lightness value of the reflected/wrapped image. Negative values make the reflection darker and positive values make the reflection lighter.
Softness: Softens the edges of the border image that is reflected or wrapped.
Width: Controls the width of the reflection or wrap that is generated. Higher numbers result in a larger border. The following examples show the View menu set to Wrap On Black.
Apply Mode menu: Determines the method that is used to composite the border. For descriptions of all the possible Apply Modes, Click Here.
Mix with Original: Blends the original and modified results. Use this parameter to control the effective amount of the light wrap adjustment.
Composite Group
The Composite Group contains options for compositing the foreground image over the background. This group is available when Composite Over BG is enabled.
Opacity scales the opacity of the corner pin image. At an Opacity value of 100, the image is completely opaque. At a value of 0, the image is completely transparent.
The Apply Mode menu controls how the source and corner pin images are composited. This filter is most useful with Apply Modes other than Normal. For descriptions of all the Apply Modes, Click Here.
Apply Mix blends the Apply Mode setting with the Normal apply mode. The resulting mixed mode is used to composite the Corner Pin media over the filtered layer. For example, if Apply Mode is set to Lighten, then an Apply Mix value of 0 uses the Normal apply mode; an Apply Mix value of 100 uses the Lighten apply mode. An Apply Mix value of 50 blends the two apply modes equally. You can use Apply Mix to soften the effect of a given apply mode, or to animate over time.
Motion Tracker/Mocha
The BCC Mocha Motion Tracker provides built-in motion and parameter tracking. It is typically used to motion track an object in the background source to attach a corner pin to. Unlike corner pin tracking in previous versions of Continuum, the new Mocha Motion tracker needs only to track a single area, rather than four seperate points. Motion tracker data can be applied to either the corner pin itself or the source pins.
For more information on working with Mocha Motion tracker, click here.
PixelChooser/Mocha
The BCC PixelChooser/Mocha provides built-in masking and tracking of the effect result. The PixelChooser is generally used to select a portion of the image and restrict an effect to just the selected area while maintaining the original image content in non-selected regions. The selection can be based on geometric shapes or on the image’s luma/color properties. With built-in Mocha planar tracking, you can quickly generate vector spline mask shapes which can be tracked to lock a mask shape to the movement of a camera or a moving object in the scene.
For more information on the Mocha PixelChooser, Click Here.