Deprecated – replaced by BCC Fast Film Process
We recommend use of BCC Fast Film Process instead of BCC Film Process in BCC10 and higher. The newer BCC Fast Film Process is fully GPU accelerated using OpenCL and provides the same feature set but with much faster rendering.
Overview
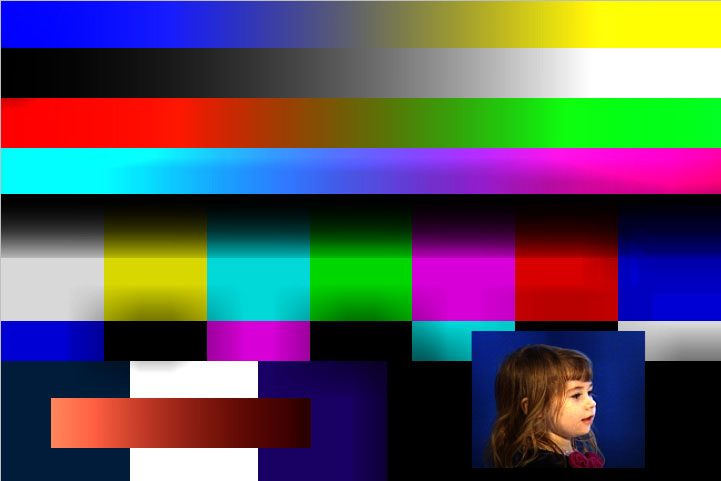
Film Process allows you to give video footage the appearance of having been shot on film. This filter allows you to integrate different types of media in a single project. For example, match computer-generated animations with archival film stock, make video appear like color-pushed film, infrared film, or color reversal film or make images appear warmer or cooler. You may want to combine this filter with the BCC Deinterlace, BCC Film Grain, BCC Film Damage and BCC Match Grain filters for the most realistic results.
 |
 |
| Unfiltered video image | Filtered to look like Color Reversal Film |
- Note: If you are combining the BCC Film Process filter with the BCC Deinterlace filter, you should apply BCC Deinterlace first. BCC Deinterlace works most effectively with the original, unprocessed pixels.
Parameter Controls
Presets and Common Controls
BCC filters come with a library of factory installed presets plus the ability to create your own custom presets and preview them with the BCC FX Browser™.
BCC filters also include common controls that configure global effect preferences and other host-specific effect settings.
For more information about working with presets and other common controls, Click Here.
Compare Mode
The BCC Compare Mode provides a convenient mechanism to compare the effect result with the original source layer. It provides several variations on basic split-screen views with the filtered clip placed next to the unedited original.
For more information on the Compare Mode, Click Here.
The Quality menu sets the rendering optimization for the filter. For most applications, you can use the default of Faster. Smoother takes more time to render, but will generally correct any problems with banding.
The Operation menu is a display control.
- Normal displays the output of the filter.
- Preprocess Only is useful if you want to view only the PreProcess parameters so that you can “normalize” or “linearize” the image with a preset applied.
Saturation Mode: Used to set the color space or gamut in which the filter will perform changes to the saturation of the input clip, instructing the filter to process particular luma values in one of several separate ways when increasing or decreasing the Saturation of the input.
- HSV -‐ Hue, Saturation, Value
- HSL -‐ Hue, Saturation, Lightness
- HSI -‐ Hue, Saturation, Interpreted
- HSP -‐ Hue, Saturation, Perceptual
- HSLuma -‐ Hue, Saturation, Luminance
Hint: Setting the Saturation Mode to HSP provides the greatest tonal range when generating black and white images.
PreProcess Group
Gamma Compensation is used to linearize the gamma of the clip. The BCC Film Process filter is most effective on clips with a gamma of 1.0. Set this to the current gamma of the clip, and it adjusts the gamma to 1.0. Increasing Gamma lightens the image and decreases contrast, while decreasing Gamma darkens the image and increases contrast.
Saturation adjusts the intensity of each color’s hue in the image. Negative values remove color from the image, and positive values add color to the image.
Brightness adjusts the brightness of the output channels.
Contrast adjusts the contrast of the output channels.
Lens Misting Group
Shadow Mist applies a blur to dark areas. Video shot at night or in poorly lit settings often contains noise in these areas. Increasing this value applies the blur to more areas.
Increasing Shadow Spread causes each point in the rendered output to be affected more by points farther away from it in the blur. This adjusts the size of the applied blur.
Shadow Threshold sets the threshold for defining which pixels in the image are affected by the Shadow Mist. The Shadow Mist is applied to pixels whose luminance value is below the Shadow Threshold. Increasing Shadow Threshold increases the amount the image that blurs.
Highlight Mist applies a blur to light areas. Increasing this value blurs more areas.
Increasing Highlight Spread causes each point in the rendered output to be affected more by points farther away from it in the blur. This adjusts the size of the applied blur.
Highlight Threshold sets the threshold for defining which pixels in the image are affected by the Highlight Mist. The Highlight Mist is applied to pixels whose luminance value is above the Highlight Threshold. Increasing Highlight Threshold reduces the amount of the image that blurs. The following example shows a highlight blooming effect achieved by adjusting the Highlight Mist, Highlight Spread and Highlight Threshold parameters.
 |
 |
| Unfiltered image | Highlight Blooming Effect |
Film Tinting Group
These parameters allow you to tint your clip. You can tint all pixels, the highlights or the shadows. When you adjust these parameters, the pixel’s luminance is preserved.
Overall Tint, Highlight Tint and Shadow Tint set the strength of the tint that is applied to all pixels, only the highlights and only the shadows respectively.
The Color controls set the color of the Overall Tint, Highlight Tint and Shadow Tint respectively.
Highlight Threshold sets the threshold for defining which pixels in the image are affected by the Highlight Tint. The Highlight Tint is applied to pixels whose luminance value is above the Highlight Threshold. Decreasing Threshold increases the amount of the image that is tinted.
Shadow Threshold sets the threshold for defining which pixels in the image are affected by the Shadow Tint. The Shadow Tint is applied to pixels whose luminance value is below the Shadow Threshold. Increasing Shadow Threshold reduces the amount of tint that is applied.
Post-Process Group
Warm/Cool Balance allows you to easily finetune the warm/cool (red/blue) balance in the clip. Unlike the tint parameters, this parameter does not preserve the pixel’s luminance.
 |
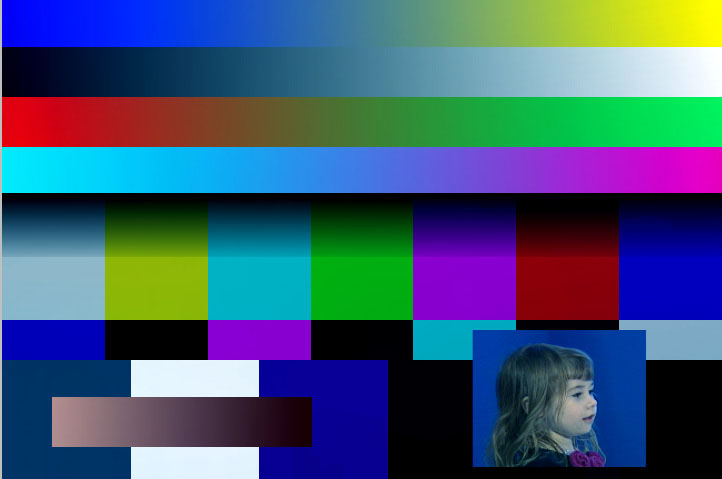 |
| Unfiltered image | Cool Balance |
Warm/Cool Hue allows you to adjust the hue of the warm/cool (red/blue) balance in the clip.
Post Saturation, Post Brightness and Post Contrast allow you to adjust the Saturation, Brightness and Contrast after the other parameters have been adjusted.
Output Gamma adjusts the image to have a given gamma. If the clip’s gamma value was 1.0 inside the filter, this sets it to the given gamma. Increasing Gamma lightens the image and decreases contrast, while decreasing Gamma darkens the image and increases contrast.
Mix with Original blends the source and filtered images. Use this parameter to animate the effect from the unfiltered to the filtered image without adjusting other settings, or to reduce the affect of the filter by mixing it with the source image. At a value of 0, the image is unaffected by the filter.
Motion Tracker
The BCC Motion Tracker allows you to track the motion of an object, then use the motion path to drive other geometric properties of the effect without the need for keyframing.
For more information on the Motion Tracker, Click Here.
PixelChooser
The BCC PixelChooser provides simple, built-in masking of the effect result. The PixelChooser is generally used to select a portion of the image and restrict an effect to just the selected area while maintaining the original image content in unselected regions. The selection can be based on geometric shapes or on the image’s luma/color properties.
For more information on the PixelChooser, Click Here.
