NEW IN CONTINUUM 2021, the BCC+ Holdout Composite Filter is a two-layer/track effect that effectively composites images such as fire, explosions and smoke. This filter first creates a luminance matte of the foreground and pastes it as black (or other color) over the background. You then use one of the Blend Modes to place the foreground over the “held out background”.
To add practical fire, explosions, smoke or other footage not containing an Alpha channel is normally a challenge. A normal Math Composite Add function would cause areas of the background to get brighter. This is bad. Using a key of some type would most likely generate unwanted edge fringing. This is also bad. Holdout Composite solves these problems.
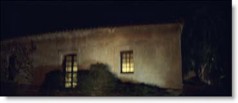
Background Image 
Foreground Image
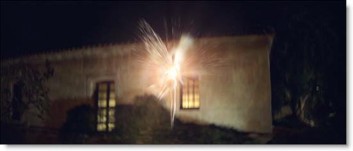
Filter Parameters
Background: Selects what image to use as the background.
After Effects / Premiere Pro
- Choose the layer/track to use as the background.
Avid
- The track below the current track is automatically used as the background.
Final Cut Pro
- Click the drop zone to the right of the Background parameter, choose a clip, and press Apply Clip below the Viewer.
Motion
- Drag the image to be used as the background and place it onto the drop zone to the right of the Background parameter.
OFX
- Node Based Hosts: Hook up the background clip in the Node Graph.
- Layer Based Hosts: The layer/track below the current layer/track is automatically used as the background.
Note: Assigning the background input requires an OFX host that supports auxiliary inputs. Consult the host documentation for instructions on how to assign an auxiliary input as this will vary by host.
Blend: This selects the type of Math Composite to use for the foreground element.
- Add: The pixels of the foreground are added to the background.
- Screen: The foreground and background are combined using a Screen blend mode. This looks kind of like the Add blend mode, but highlights are retained.
- Lighten: Compares the foreground and background and takes the pixels with the higher value.
Level: Sets the level of the foreground element.
Black Clip: Blacks are made blacker by increasing the value of the slider. As the slider value increases, more values are clipped to black.
Note: Often times the black portion of an image is not entirely black. This becomes an issue if something like fire is shot against a black background. If the black is not entirely black, then these impure black areas will be added to the background image as part of the Holdout Composite causing the final result to have milky blacks. Black Clip will improve these milky blacks and make them darker.
Matte
The Holdout Composite first creates a luminance matte of the foreground and then pastes it as black (or other color) over the background. You can see the extracted matte with the View set to Matte.
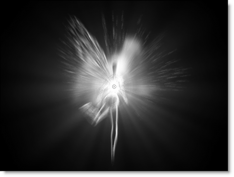
Black Clip: Blacks in the matte are made blacker by increasing the value of the slider. As the slider value increases, more values are clipped to black. This is helpful for getting rid of unwanted gray areas in what should be the black part of the matte.
White Clip: Whites in the matte are made whiter by increasing the value of the slider. As the slider value increases, more values are clipped to white. This is helpful for getting rid of unwanted Grey areas in what should be the white part of the matte.
Holdout
The Holdout Composite takes the luminance matte of the foreground and pastes it as black (or other color) over the background. You can see the matte pasted onto the background with the View set to Holdout.

Matte Background 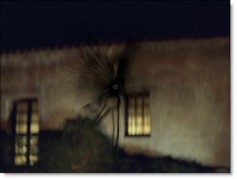
Paste Color
Color: The Color parameter sets the color of the Holdout matte through the use of a standard eyedropper or color picker. The default color is black.
Note: There may be times when you want to select a color from the background as the Holdout color. This will appear to give the foreground some atmosphere.
Opacity: The opacity of the color.
PixelChooser: The BCC PixelChooser provides a way for the user to select which pixels in the filtered source are actually going to be affected by the filter, via the generation of image based mattes, gradient mattes and vector shape masks. Mocha planar tracking and vector shape masking options are included in the PixelChooser, which allows for the generation of motion-tracked mask shapes as a hold-back mask.
For more information on the PixelChooser, Click Here.
Working with The Filter
- Apply BCC+ Holdout Composite from the Key and Blend unit:
- After Effects / Premiere Pro
- To use Holdout Composite, the layers/tracks should be stacked in the following order from bottom to top: background and then foreground.
- Apply Holdout Composite to the top foreground layer/track.
- Using the Background pop-up menu, choose the layer/track to be used as the background.
- Avid
- To use Holdout Composite, the video tracks should be stacked in the following order from bottom to top: background and then foreground.
- Apply Holdout Composite to the top foreground track.
- Final Cut Pro
- Apply Holdout Composite to a clip.
- Click the drop zone to the right of the Background parameter, choose a clip, and press Apply Clip below the Viewer.
- Motion
- Apply Holdout Composite to a clip.
- Drag the clip to be used as the background and place it onto the drop zone to the right of the Background parameter.
- OFX
- For node based hosts, apply Holdout Composite to a foreground clip and then hook up a background clip.
- For layer based hosts, the layers/tracks should be stacked in the following order from bottom to top: background and then a foreground clip. Then, apply Holdout Composite to the top foreground layer/track.
- Note: In Vegas, Holdout Composite is accessed through the Composite Mode icon in the track controls and then navigating to the Custom Composite category.
- Holdout Composite creates a luminance matte of the foreground and pastes it as black (or optionally as another color) over the background. You can adjust Black and White Clip of this luminance matte using the Matte controls.
- Change the View to Matte.
- If needed, adjust the Matte > Black Clip to make blacks in the matte blacker.
- If needed, adjust the Matte > White Clip to make whites in the matte whiter.
- Change the View back to Output.
- Choose either the Add, Screen or Lighten Blend mode. Add or Screen usually work best.
- Set the Level control to your liking.If the blacks in your composite look milky, it is usually because the foreground blacks are not entirely black. These impure black areas will be added to the background image as part of the Holdout Composite causing the final result to have milky blacks. You can improve milky blacks using Black Clip.
- Use Black Clip if the composite’s blacks look milky.