Overview
BCC Particle Array 3D is a particle based generator style filter. Particle Array 3D generates a 3D array of particles and offers several interesting ways of manipulating the array based on graph controls, alternate AE layers, fractal noise patterns, random dispersion, and more. The filter supports AE lights and camera for simple integration into AE 3D compositions. It also includes an integrated Beat Reactor group for creating dynamic animations directly influenced by audio layers.
Function
Presets and Common Controls
BCC filters come with a library of factory installed presets plus the ability to create your own custom presets and preview them with the BCC FX Browser™.
BCC filters also include common controls that configure global effect preferences and other host-specific effect settings.
For more information about working with presets and other common controls, Click Here.
Render Group
Includes parameters affecting the image quality of the effect and other global render related settings
Anti-Aliasing: sets the level of anti-aliasing applied to smooth edges. The options are:
- None
- Low
- High
- Higher
- Highest
Opacity Boost: controls the opacity of the particles.
Use Source Mask: When enabled, the particle array will take any masking applied to the filter layer into account in it’s use of the layer, otherwise it will ignore masks.
Particle Intersection: Clicking this checkbox allows for particles to intersect in three dimensional space.
Motion Blur and Shutter Angle ; offers options for various levels , simulating motion blur seen in camera footage. When set to Host Settings, the motion blur of the filter matches the motion blur set for the AE comp it’s applied in.
Depth of Field Blur: Determines the amount the amount of blur in front and behind the focus of the camera.
Use Comp Lights: When enabled, the filter will use AE lights enabled in the comp. The maximum number of total lights (including built-in and AE lights) the filter can use at once is 8. If there are more than 8 enabled AE lights in the comp it will use the 8 enabled light tracks that are topmost in the timeline.
Use Built-in Lights: There are also 3 built-in lights available. It’s possible to use both built-in and AE lights simultaneously. If enabled, the built-in lights will have priority over AE lights in terms of which lights get used if the total number of lights exceeds 8.
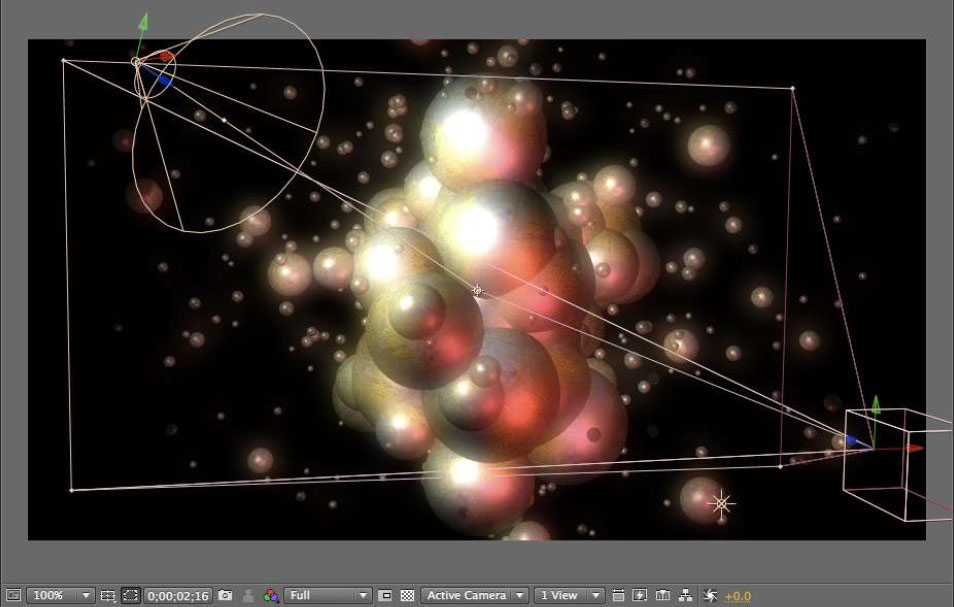
Use Comp Camera: When enabled, the filter will display the Pin Screen from the perspective of the enabled AE camera whose track is topmost in the timeline. When Use Comp Camera is enabled, the Built-In Camera group is disabled.
 |
Particles Group
- Particle Shape ; determines the type of particle used in the array. 3D Particle Types support 3D lighting and textures, while most other choices do not. The Custom Shapes choice also supports 3D lighting and textures.
- Texture Layer and Texture Modes ; allow for using the image (Color and Alpha or Alpha Only) from an alternate layer as the texture displayed by each particle
- Preserve Orientation ; when Preserve Orientation is enabled, 3D particles’ orientation in relation to the camera is maintained regardless of the camera perspective or array rotations. This means that if the Particle Transforms are left at default, the particles will always seem to be facing the camera which is useful for some types of effects. The Preserve Orientation setting does not apply to other (non-3D) Particle Types since those types always face the camera regardless of perspective or rotations.
- Color Mode (Custom Color, Color Layer X/Y, Color Layer Random, Custom Color and Layer Alpha X/Y) ; options for specifying a color or an alternate AE layer, or a combination of the 2 for defining the colr and alpha of the particles
- Size, Size Variance, Min Size ; for adjusting and varying the size of the particles.
- Opacity ; determines the translucence of the particles.
- Shape Character ; this parameter makes the 3D Discs to appear with hollow centers and it can change the 3D Cylinders into Cone shapes.
- Material Shininess and Material Specular ; for 3D snd Custom Shape particle types, these parameters allow for adjusting the appearance of 3D lighting on the surface of the particles.
Array Group
- Array Layout (Grid, Grid Sphere, Onion Spheres, Random Box, Random Sphere) ; options for the shape of the array.
- Num Particles X, Y, and Z ; sets the number of particles along each axis.
- Master Scale, Scale X, Y, and Z ; sets the overall scale of the array without changing the size of the particles.
Transform System Group
- Global Scale ; scale the array including scale of the particles
- Center X, Y , and Z ; 3D position of the array
- Mirror Mode ; various options for achieving a symmetrical look to the array
- Rotate X, Y, Z ; array based rotation on 3 axes – rotation is applied to array and particles
- Lock Pivot, Pivot X, Y, and Z ; unlocking the pivot allows for offsetting 3D pivot from position
- World Rotate X, Y, and Z ; world based rotation on 3 axes
Transform Particle Group
- Scale X, Y, and Z ; scale control of particles including individual X/Y/Z
- Tumble, Spin, and Rotate ; allows for transforming 3D particles independently from the array (disabled for non 3D pins)
- Variance parameters ; allows for varying the rotation amount between particles based on a random algorithm
- Bi-directional Rotation ; allow for varied rotation in both directions simultaneously (positive and negative)
Built-in Camera Group
- Camera Model ; Position, Orbit – camera offering 3D position and orientation control, or an orbit camera for easily adjusting perspective while remaining focused on the 3D center
- Field of View ; an adjustment that can be used to simulate the look of various lenses – a large value gives a wide angle look
- Camera Position X, Y, and Z ; 3D coordinate control for camera
- Camera Tumble, Spin, and Rotate ; controls for orientation of the position based camera
- Use Depth of Field, DOF Focal Point, Aperture, Blur ; controls for simulating camera depth of field
Built-in Lights Group
- Enable ; 3 built in lights which can be individually enabled/disabled
- Ambient ; increasing this value gives some of the light color to the dark (unlit) areas
- Type ; determines whether the light will appear as a spot light or point light
- Light Intensity ; intensity of the light
- Specular Highlight ; determines how much the light contributes to any specular highlights on the particles – the color of the specular highlights is determined by the Material Specular prameter in the Particles group
- Color ; the color of the light
- Position X, Y, and Z ; 3D position of the light source
- Tumble and Spin ; determines the orientation of the light if it is a spotlight
- Spot Angle and Feather ; for spotlight, these determine the angle of the light cone and the softness of spot edges
Dispersion Group
- Disperse Master, Disperse X, Y, and Z ; disperses the particles from their original locations based on a random algorithm – a master control and control for dispersion along the individual 3D axes
- Disperse Variance ; allows for adjusting the range of random dispersion between the particles
 |
Twist Group
- Twist Mode ; allows for specifying along which axis the twist deformation is applied to the array
- Twist Angle, Twist Offset, Twist Direction ; controls for applying a twist deformation to the particle array
 |
Shift Group
- Shift Master, Shift X, Y, and Z ; shifts the particles from their original locations – a master control and control for shift along the individual 3D axes (particularly useful in conjunction with Control Maps)
Fractal Noise Group
- Apply To ; determines if the noise pattern is applied to ; XYZ Field, Opacity, Mix Color, Disperse Effect, Twist Effect, Shift Effect, Particle Size, or Particle Rotation
- Amplitude Master, Amplitude X, Y, and Z ; determines the Amplitude of the Noise pattern as applied to XYZ Field choice
- Frequency Master, Frequency X, Y, and Z ; determines the frequency of the noise pattern with separate control for each axis
- Auto Evolve Speed ; speed of the auto animation of the noise pattern – set ot zero to turn off auto animation
- Auto Loop ; the number of seconds at which the noise pattern animation will seemlessly loop
- Evolve X, Y, and Z ; offsets for the noise pattern animation – can be used to manually animate noise
Control Maps Group
Control Maps which each allow for influencing the particle array using Graph, Layer, and Wipe Controls
- Apply To ; determines which aspect of the particle array the Control Map is set to influence
- Apply Offset % ; a master offset parameter which applies to the overall effect of the Control Map
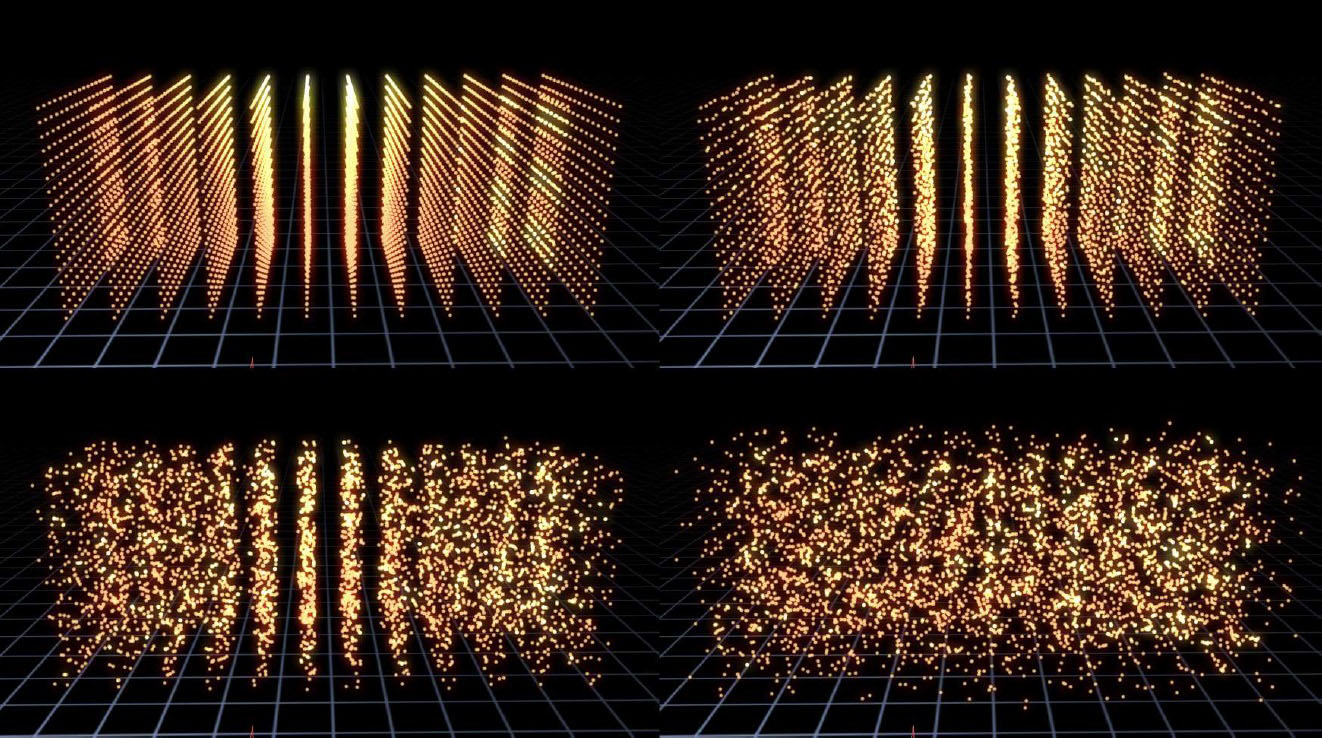
Graph Controls: in the illustrations below, the Control Map is set to Apply To Disperse Effect, and the Graph Control is being used to map the dispersion to the array. The 1st image (upper left) shows an empty graph (no dispersion) and the 2nd image (upper right) shows a full graph (dispersion over the entire array), the other images show partial dispersions based on the graph. The array is being viewed from a camera pointed at it from the right side ; for the 1st 6 images the graph is being applied along the Z Axis, and for the last 2 images the graph is being applied along the Y Axis.
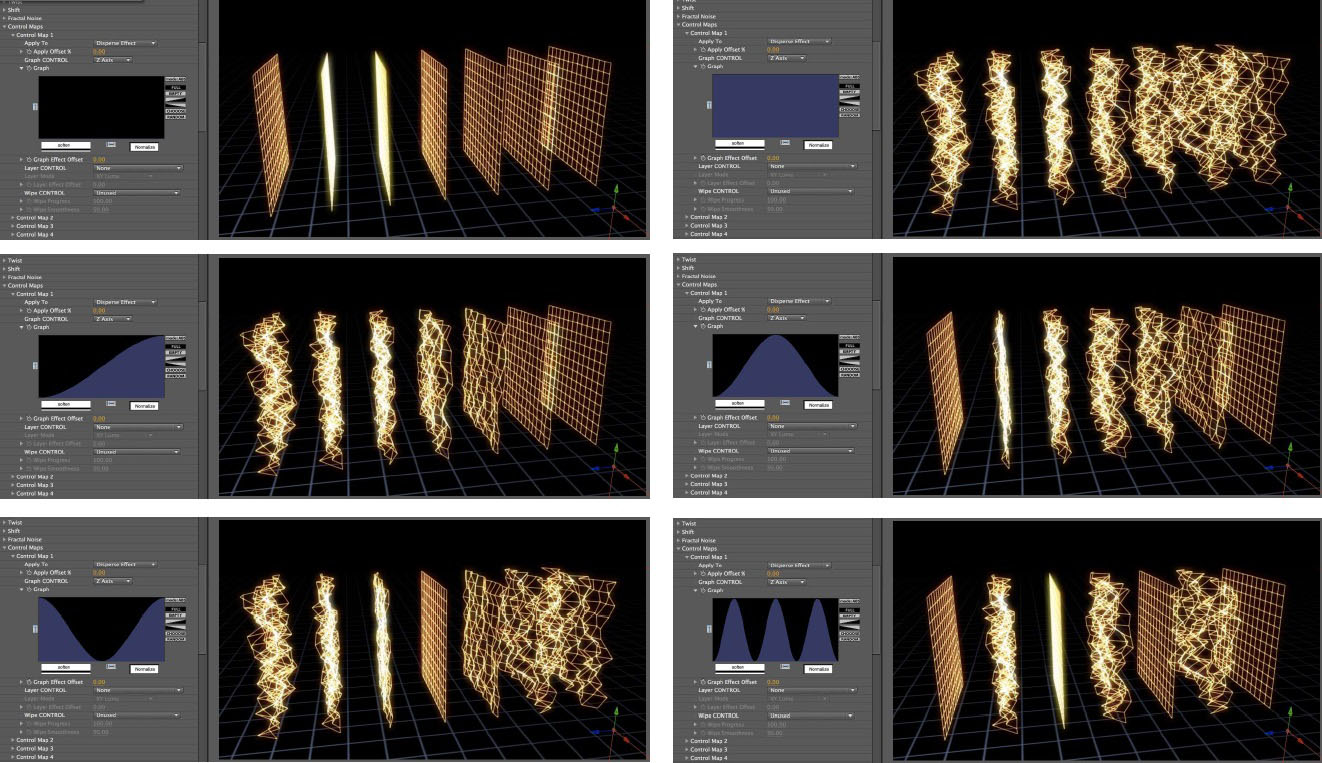 |
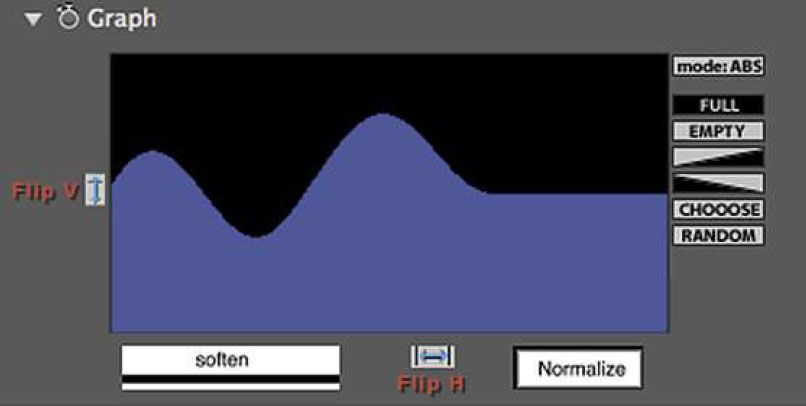
Graph Control Graph UI: The blue colored area of the graph represents areas of the particle array that will be affected by the control map effect while black represents areas that will not. How the graph maps to the particle array in 3D is determined by the Graph Control popup menu that offers choices such as X, Y, or Z Axis, etc.
Graph Buttons: The graph includes buttons for flipping the graph horizontally and vertically, buttons for making the graph FULL (completely blue color) or EMPTY (completely black color) or half and half using even diagonals. The RANDOM button will generate a random graph and it can be useful to try clicking this button repeatedly watching the graph and the effect on the particle array to spot interesting results. The CHOOSE button cycles through a series of preset graphs illustrated immediately below. These preset graphs can be used as they are or modified in various ways. By keyframing the graph itself it’s also possible to interpolate between them.
 |
There are also buttons to Soften or Normalize the graph (see illustration below).
Moving the cursor over the graph display itself results in a different cursor display and clicking and dragging within the graph allows for freehand drawing to edit the graph. The “mode” button toggles between 2 different graph editing modes (and different cursors) ; Absolute (ABS) mode will completely redraw the area of the graph in which the mouse drag occurs, while Relative (+/-) mode will either extend or carve away from the blue area depending on where the cursor is when the click/drag begins. The cursor shows a “+” (plus) sign when in the blue area of the graph and clicking and dragging then will allow for adding to the blue area, and the cursor shows a “-” (minus) sign when in the black area and clicking and dragging then will allow for subtracting from the blue area. When editing the graph by hand the result is sometimes not so smooth but clicking the “soften” button a few times can smooth it out nicely.
- Note: The graph itself is an animatable parameter, and so it is possible to have different graphs on different keyframes and the filter will interpolate between the 2 graphs. This can be used to get some interesting results.
- Graph Effect Offset ; an offset parameter specifically affecting the Graph Control
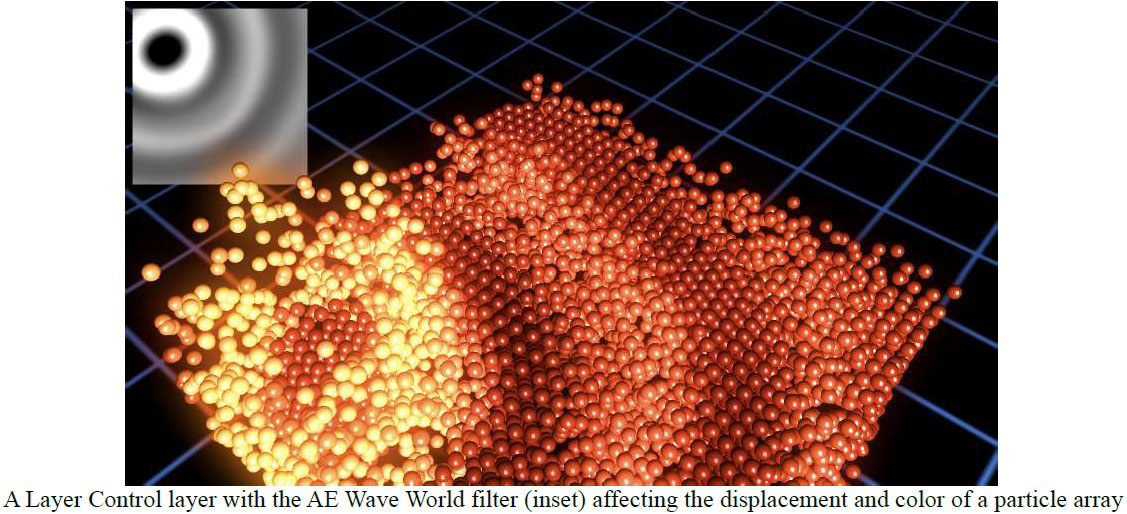
- Layer Control ; a layer selector so the control map can use an alternate layer to influence the particle array
- Layer Mode ; options for how the control map reads/uses the alternate layer
- Layer Effect Offset ; an offset parameter specifically affecting the Layer Control
- Wipe Control ; offers many options for wiping the effects of the control map on and off. Below are images showing a particle array with the Color Mix Color partially wiped on using various wipe types.
 |
- Wipe Progress and Wipe Smoothness ; @ Progress zero none of the control map effect is displayed, @ Progress 100 the control map effect is entirely wiped on. For some effects, extending the Progress to 200 allows for further wiping the effect to the other extreme (so the entire array is displaying the effect). Wipe Smoothness allows for a softer edge to the wipe.
Beat Reactor
The BCC Beat Reactor is an animation control suite which drives effect properties based on the contents of an audio track. This lets you seamlessly tie visual FX to an audio soundtrack without the need for ANY manual keyframing.
For more information on the Beat Reactor, Click Here.
 |


