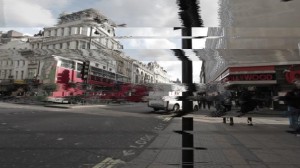
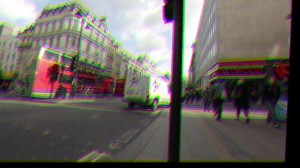
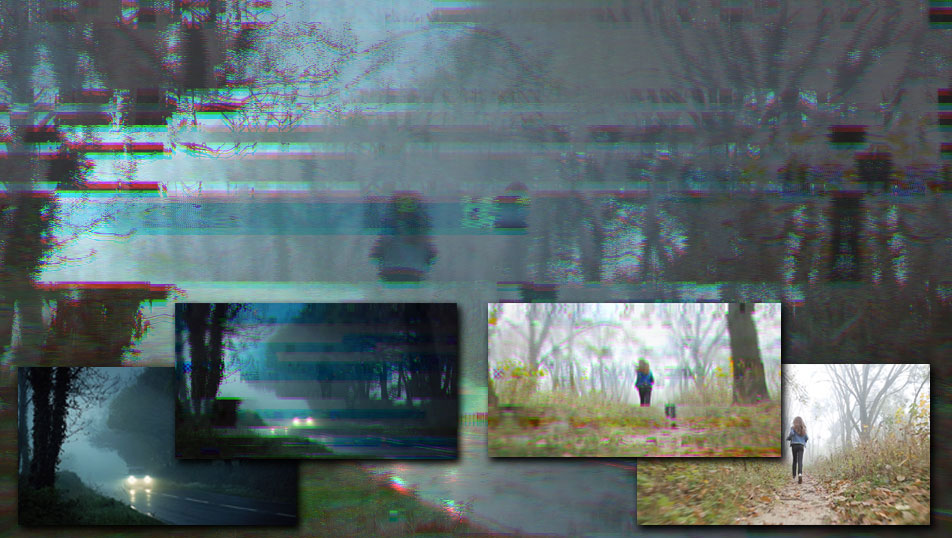
NEW IN CONTINUUM 2022.5, the BCC+ Video Glitch Dissolve filter is an auto-animating filter effect for simulating some of the kinds of errors and artifacts that can be apparent during digital video playback. The filter automatically increases in intensity as it animates the transition progresses to obscure the dissolve between clips.
Presets and the FX Editor
The FX Editor provides a convenient way to store and retrieve factory installed and/or user generated filter presets. To select a preset, open the FX Editor interface and pick one from the Presets panel. Click the apply button in the FX Editor to return to the host user interface.
To save a custom preset, click the “Create Custom Preset” icon in the top right corner of the parameter list, next to the filter name, set a name for the new custom preset in the dialog that appears and click done.
Filter Parameters
Animation: Menu controlling what drives the animation of the transition.
- Auto – automatically generates a transition based on the transition length (when used as a transition) or the clip length (when used as a filter).
- Manual – requires the user to set keyframes to control the transition progression. Can be useful in customizing the exact timing of the transition or when applying the filter as a stylized effect as opposed to a direct NLE-style transition.
Layer to Reveal – This layer selection popup is not relevant when you have applied the filter as a true NLE-style transition and it will be hidden or disabled in that context. When applied as a normal “effect” as opposed to a transition, however, this menu is used to select the “Incoming” or “Reveal” layer for the transition.
Percent Done: Disabled/Hidden by default. When the Animation menu is changed to Percent Done then this slider can be manually keyframed to control the transition progression.
Trigger Mode: Offers 2 basic modes for how / when glitches are triggered in the effect.
- Automatic: the time at which glitches are triggered is based only on the values of the Glitch Interval and Interval Randomness parameters.
- Intensity Threshold: a single glitch is triggered whenever the Glitch Intensity crosses a specified threshold (Trigger Threshold parameter) in a positive direction (from lower to higher value) either by animating Glitch Intensity by keyframing, or by driving Glitch Intensity through the Beat Reactor.
Global Seed: used to adjust the global random seed for all video glitch groups.
Glitch Intensity: used to adjust the global intensity for all video glitch groups.
Intensity Randomness: used to set the random seed for the global glitch intensity.
Intensity Seed: used to control the the randomized intensity of glitches.
Intensity Trigger Threshold: With Trigger Mode set to Intensity Threshold, this sets the Glitch Intensity value at which a glitch will be triggered as Glitch Intensity increases.
Glitch Interval: Global interval control that applies to all Video Glitch groups. Expressed in the number of frames between glitches.
Interval Randomness: Randomizes the global Glitch Interval.
Interval Seed: Allows for changing the randomized timing of all Glitches. Each individual glitch group also contains an additional seed parameter to allow varying the timing of the separate glitch elements.
Start at 0: Enabling this checkbox forces the first glitch to occur at the beginning of the effect (even when Interval is randomized).
Glitch Duration: The length of the Glitches in time. It is expressed as a percent of the Interval so the duration in terms of frames or seconds changes if the Interval is changed.
Duration Randomness: Randomizes the Glitch Duration.
Duration Mode: controls the type of duration.
- Actual: the actual length of the glitches in time.
- Average: the average length of the glitches in time.
Edge Handling: The Shift and Shake features described below can create instances where the image is offset so there are areas along the edges of the frame where no image appears during Glitches.
- Zero: used to disable edge handling. No image appears along exposed edges of the frame.
- Tile: repeats edge pixels to generate opaque pixels along the edge of the result.
- Reflect: reflects pixels back into the result to generate opaque pixels along the edge of the result. This is the default setting of the filter.
- Clamp: locks the edge pixels to the edge of the frame, to generate stretched opaque pixels along the edge of the result
Note – Each individual group below includes its own Interval Seed, and varying those seeds between groups allows for varying the timing between the different Glitch components.
Block Damage Group
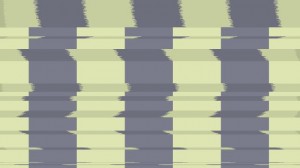
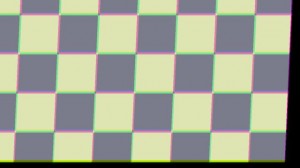
With Block Damage enabled, a field of square blocks overlays the image during a glitch. By design, in a typical effect using Block Damage some blocks will be more apparent than others depending on how they composite with the underlying image in that area of the frame, as seen on the left hand image below. When the same Block Damage pattern is applied to a solid color so all the blocks are clearly defined at once, as in the right hand image below, the darker more saturated areas of squares are what is meant by Blocks, and the striped or weaved designs which can be seen within some Blocks are what is referred to in the parameter descriptions below as Patterns.
Enable Block Damage: Controls whether the Block Damage elements are enabled or disabled.
Block Damage Intensity: Used to adjust the overall amount of blocks on screen during a glitch.
Peak Position: Defines at what point within the duration of the glitch shows the most blocks, with zero being the beginning of the glitch, 100 the end, and 50 the midpoint.
Minimum Intensity: Allows for forcing a minimum amount of blocks for the glitch duration.
Intensity Randomness: Adds more variability to the animation within the glitch duration – larger values give a more flickering appearance.
Block Run Length: Controls the number of blocks between gaps. A value of zero generates completely independent blocks. A value of 100 generates one run of blocks with gaps on either side.
Block Size: Offers 5 options for the size of the Blocks.
Block Saturation: Values > 100 oversaturate and values < 100 desaturate the Block Damage area.
Block Blend Mode: Blend options for compositing with source image. Depending on the Blend Mode, the image freeze and Pattern effects can be more or less apparent.
Pattern Amount: Increases or decreases the percentage of the Blocks displaying a Pattern.
Pattern Complexity: Adds a variety of smaller patterns within the blocks with patterns.
Pattern Opacity: Sets the maximum opacity for the Patterns.
Vary Pattern Opacity: Randomly reduces max opacity for some Patterns by varying amounts.
Vary Pattern Color: Tints some percentage of the patterns with colors. A value of zero leaves them all black.
Freeze Source: When enabled, the area of the source video within the block damage freezes and holds on the same frame for the duration of the glitch.
Block Seed: Allows for changing the randomized arrangement of the Block Damage.
Intensity Randomness: Adds more variability to the animation within the glitch duration – larger values give a more flickering appearance.
Block Interval Seed: Allows for changing the randomized timing of Block Damage.
Shift Group
With Shift enabled, horizontal bands of the image become horizontally displaced and skewed during a Glitch. As a primarily horizontal distortion it stands out more in areas of the image with more high contrast vertical edges. When using multiple groups the order of processing relative to parameter group layout is top to bottom so when using Block Damage the Blocks are affected by Shift.
Enable Shift: Controls whether the Shift distortions are enabled or disabled.
Shift Group Intensity: Used to adjust the overall strength of the shift distortions during a glitch.
Peak Position: Defines at what point within the duration of the glitch shows the most shift, with zero being the beginning of the glitch, 100 the end, and 50 the midpoint.
Minimum Intensity: Allows for forcing a minimum intensity of shift for the glitch duration.
Intensity Randomness: Adds more variability to the animation within the glitch duration – larger values give a more flickering appearance.
Line Duplication: Artifacts where horizontal lines of pixels are duplicated and positioned adjacent to each other vertically. This creates the appearance of vertical stripes in areas of the image.
Shift Amount: Increases or decreases the peak horizontal Shift and Jitter amount in the shift animation that occurs over the duration of the Glitch.
Shift Density: Used to adjust the overall density of Shift bands on screen during a Glitch.
Shift Run Length: Controls the number of shifted lines between gaps.
Skew: Defines the peak horizontal Skew amount in the shift animation that occurs over the duration of the Glitch.
Jitter: Jitter adds an additional randomized horizontal shift to each line (1 pixel horizontal band) within the Shift band.
Line Drop: Line Drop fades the opacity of every other line (every other 1 pixel horizontal band).
Line Drop Density: Allows for randomly skipping some line drops (when value is < zero).
Intensity Seed: Allows for changing the randomization of Shift Intensity.
Shift Interval Seed: Allows for changing the randomized timing of Block Damage.
Shake Group
With Shake enabled, the image position is offset and/or skewed / rotated over the duration of the Glitch. Any Block Damage or Shift elements are offset by effects in the Shake group.
Enable Shake: Controls whether the Shake distortions are enabled or disabled.
Shake Group: Intensity Scales the Intensity of all the attributes of the Shake group.
Peak Position: Defines at what point within the duration of the glitch shows the most shake, with zero being the beginning of the glitch, 100 the end, and 50 the midpoint.
Minimum Intensity: Allows for forcing a minimum intensity of shake for the glitch duration.
Intensity Randomness: Adds more variability to the animation within the glitch duration – larger values give a more flickering appearance.
Shake Amount: Controls amount of overall position offset (also scales RGB Split value).
Shake X: Horizontal position offset.
Shake Y: Vertical position offset.
RGB Split: Controls how much RGB are offset from each other in the direction of Shake movement.
Skew: Horizontal skew applied to the image.
Rotate: Rotation anchored to the center of the image applied to the image.
Shake Intensity Seed: Allows for changing the randomization of Shake Intensity.
Shake Interval Seed: Allows for changing the randomized timing of Shake effects.
Flicker Group
With Flicker enabled, the brightness and/or saturation of the image can flicker during Glitches.
Enable Flicker: Controls whether the Flicker distortions are enabled or disabled.
Flicker Group Intensity: Scales the Intensity of all the attributes of the Flicker group.
Peak Position: Defines at what point within the duration of the glitch shows the most flicker, with zero being the beginning of the glitch, 100 the end, and 50 the midpoint.
Minimum Intensity: Allows for forcing a minimum intensity of flicker for the glitch duration.
Brightness: Controls the peak level of the brightness effect on the image.
Brightness Randomness: Controls the randomness of the brightness distortion.
Brightness Offset: Allows for setting it to flicker more brighter or darker than the original. A value of Zero flickers brighter and darker, a value of 100 flickers only brighter, a value of negative 100 flickers only darker.
Flicker Saturation: Controls the extremity of the saturation effect on the image.
Saturation Randomness: Controls the randomness of the saturation distortion.
Saturation Offset Allows for setting it to flicker more oversaturated or desaturated. A value of Zero flickers both ways, a value of 100 flickers only oversaturated, a value of negative 100 flickers only desaturated.
Flicker Intensity Seed: Allows for changing the randomization of Flicker Intensity.
Flicker Interval Seed: Allows for changing the randomized timing of Flicker effects.
Use Background Color: Enabled so a color not transparency will fill the areas created by Shake, Shift, and Line Drop.
Background Color: The color to use to fill background areas described above.
Curves Group
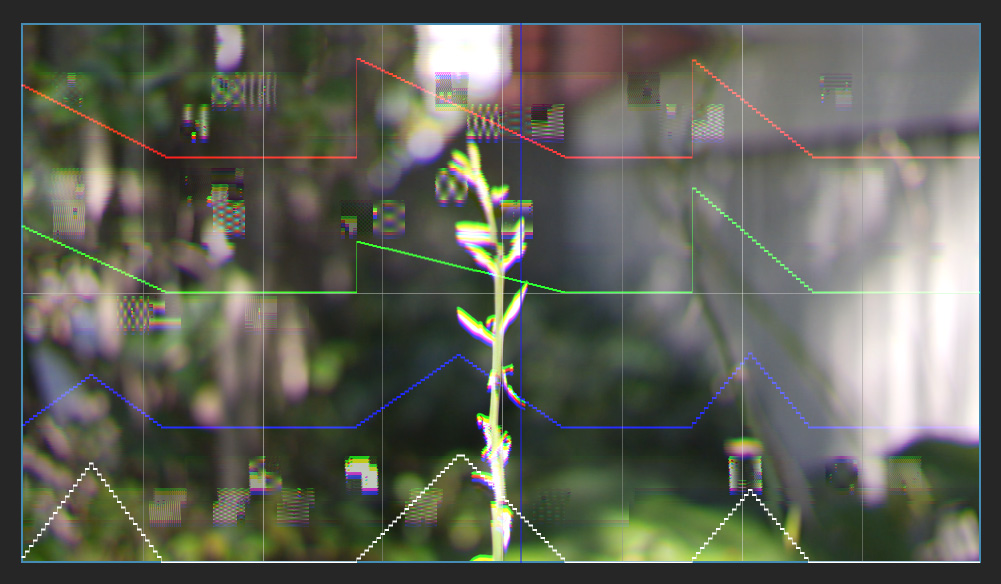
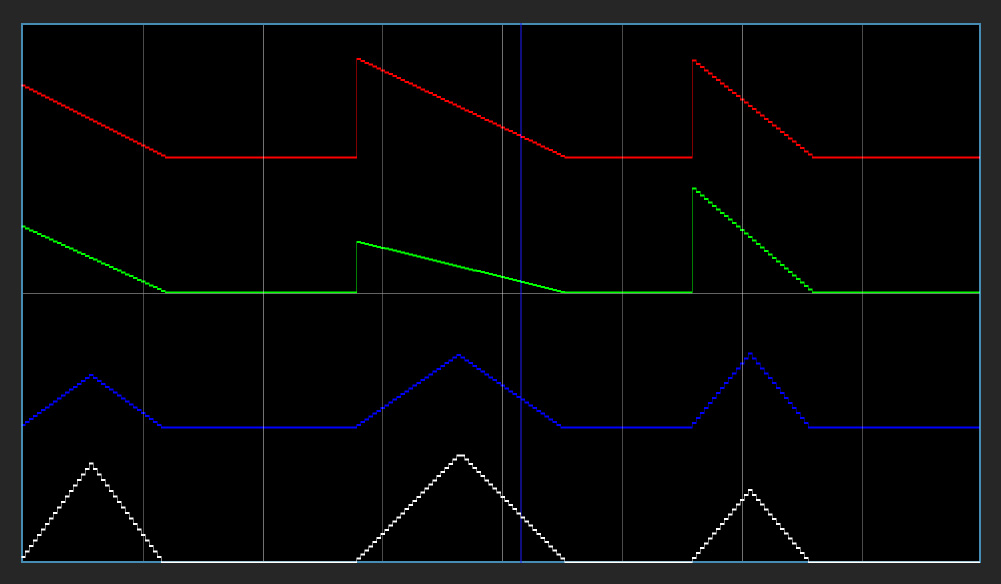
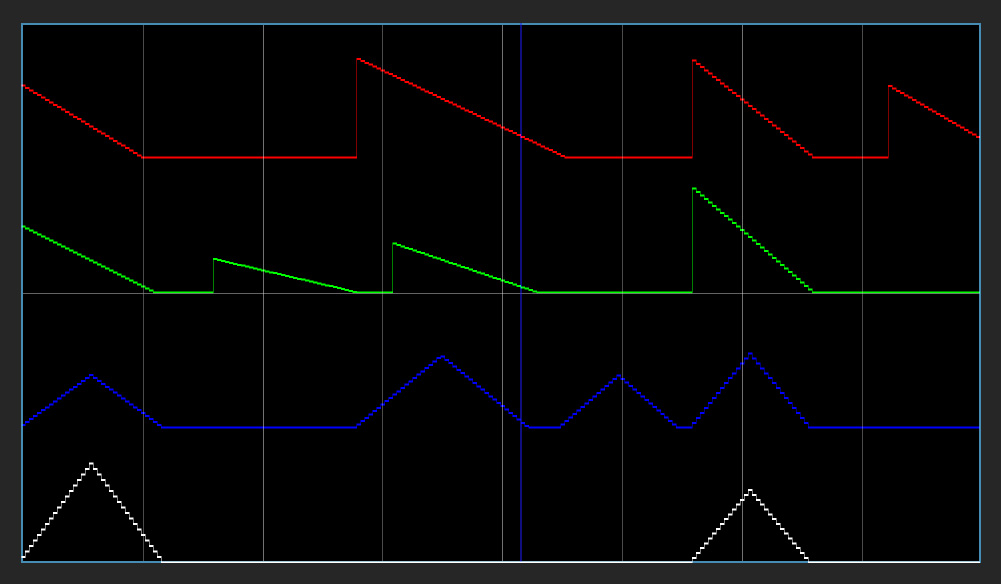
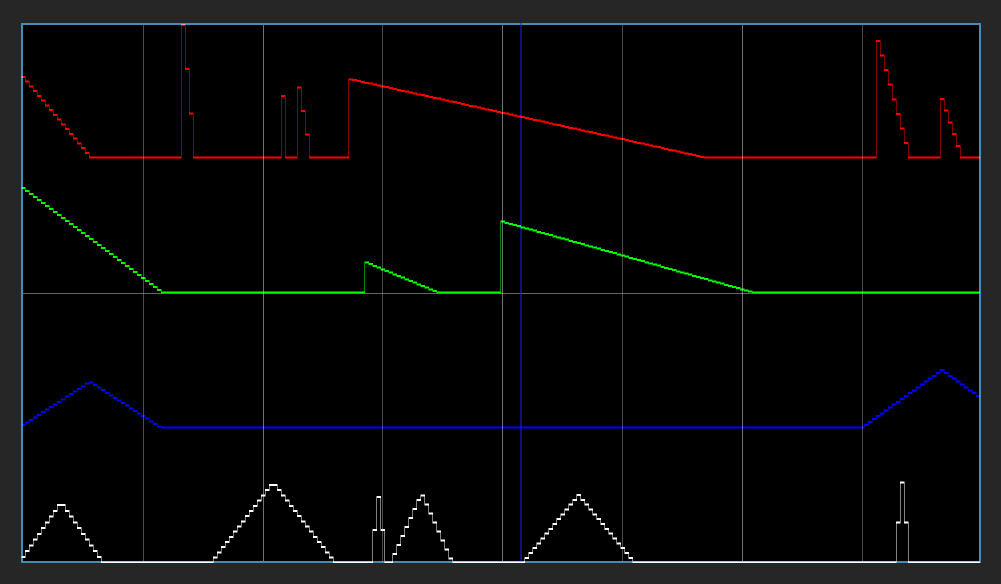
The parameters in the Curves group control a special timeline-like preview overlay that aids in visualizing the location and duration of the glitches over time, including when driving glitch behavior via audio data with the Beat Reactor. Note, since the preview curve is rendered directly into the image, be sure to disable the curve or change it to Draft Only mode before doing final renders. The various glitch preview curves are distinguished by color:.
- Horizontal Lines: Red is Block Damage, Green is Shift, Blue is Shake, and White is Flicker.
- Vertical Blue Line: indicates the current frame’s position within the graph.
Curve View: Controls if and when the preview graph is displayed.
- Off: The preview curve is disabled.
- Draft Only: The preview curve is displayed only when the host is set to draft render quality.
- Render Over Black: The preview curve displayed even in final render mode and is composited over a solid black background.
- Render Over Effect: The preview curve displayed even in final render mode and is composited over the glitched image.
Time View: Defines the time range of the preview graph (with a maximum of 30 seconds).
Scroll Curve: When viewing less than the whole effect in the graph, allows for scrolling the graph further into the effect using a time unit of seconds.
Color Correction Group
The Color Correction group provides a range of color correction tools to adjust the overall look of the transition.
Hue: Used to control the overall hue of the transition.
Saturation: Used to control the overall saturation of the transition. Higher values create a more intense color saturation than lower values.
Brightness: Used to control the overall brightness of the transition.
Higher values create a more intense highlights than lower values.
Contrast: Used to control the overall contrast of the transition. Higher values create a more intense contrast between light and dark pixels than lower values.
Gamma: Used to control the overall gamma of the transition.
Temperature: Used to control the overall temperature of the transition. Moving the Temperature slider to the left (negative values) will yield a cooler result, while moving the slider to the right will warm up the shot.
Cyan/Magenta: Used to control the overall amount of cyan/magenta in the image.. Moving the slider to the left (negative values) will add a cyan tint, while moving the slider to the right will add a magenta tint.
Red: Used to control the overall value of the red color channel. Higher values increase the overall influence of the red color channel than lower values.
Green: Used to control the overall value of the green color channel. Higher values increase the overall influence of the blue color channel than lower values.
Blue: Used to control the overall value of the blue color channel. Higher values increase the overall influence of the red color channel than lower values.
Animation Tuning Group
These parameters control the overall timing of the transition. On hosts which permit on-screen heads up display widgets (such as AE, Premiere, and Avid) you should never need to modify these sliders directly since they can be configured in a more convenient and intuitive manner by manipulating the widgets directly in your comp/preview pane. On hosts without heads up display widgets you can use these sliders directly to fine tune your animation timing, taking advantage of the View Ease Curve option to help visualize the animation rates.
Glow Ease In: Control how quickly or slowly the glow amount increases at the beginning of the transition.
Glow Ease Mid:Control the rate of change of the glow amount (how quickly it reaches its peak amount and how long it holds there) during the middle of the transition.
Glow Ease Out: Control how quickly or slowly the glow amount decreases at the end of the transition.
Dissolve Duration: Control the timing of the underlying dissolve relative to the timing of the rest of the transition.
OSC Enable: Only visible in hosts that support heads up display widgets for manipulating these controls directly on screen. Enables/Disables on screen controls.
View Ease Curve: (Only visible/enabled in hosts that don’t support heads up display widgets for manipulating these controls directly on screen.) Enable this control to display a preview graph of the the animation curves rendered into in the composite window.
GPU Rendering: allows for the selection of GPU or CPU software rendering.
- Default: Uses the GPU to render the effect.
- 16 bit float
- 32 bit float
- Disabled: disables GPU rendering and allows for CPU software rendering.
