 |
 |
| Source image | Filtered image |
Overview
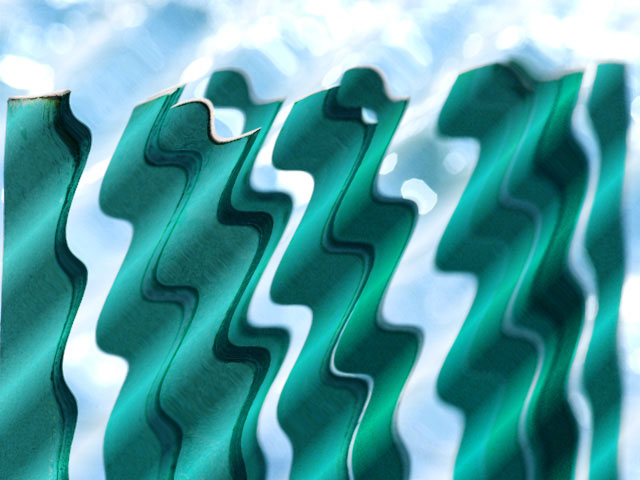
The Wave and Ripple filters are very similar, except that Wave creates parallel waves instead of waves that radiate from a point.
Function
Presets and Common Controls
BCC filters come with a library of factory installed presets plus the ability to create your own custom presets and preview them with the BCC FX Browser™.
BCC filters also include common controls that configure global effect preferences and other host-specific effect settings.
For more information about working with presets and other common controls, Click Here.
Selecting the Process Alpha Only checkbox allows you to distort the alpha channel without changing the underlying colors.
Height and Perpendicular Height determine the strength of the wave. Height controls the amount of displacement in the direction of the wave, and Trans. (Transverse) Height sets the amount of displacement perpendicular to the direction of wave motion.
Wave Width determines the distance between the peaks of the wave. The Wave Width does not affect the maximum displacement of each point in the image, but it does affect how fast the displacement changes from point to point in the image. Wave Width also affects the total number of waves visible in the effect, because as the waves become wider, fewer fit on the screen.
Speed and Phase control the motion of the waves as they move. If you look at any one peak in the wave, Speed controls the rate at which the peak moves, and Phase controls the position of the peak.
The default Speed setting of 10 moves the waves at a rate of one wave width per second. A negative Speed value moves the waves in the opposite direction. When Speed is 0, the waves are stationary (unless Phase is interpolating to a different value during the effect).
- Note: The Speed and Phase controls provide several ways to control the movement of the waves over time.
- Leave Phase at its default setting and adjust Speed. Try this technique if you care about the overall motion of the effect but not about the exact number of waves created.
- To precisely control the point at which the wave effect begins (for example, whether it begins at a peak or a trough), adjust the Phase control in the first frame of the effect until the wave is at the desired point. To control the number of waves that pass by over the duration of the clip, set Speed to 0 and animate Phase to create movement. For example, suppose you want exactly five waves to form and disperse. Set the first keyframe of the clip to a Phase of 0. Set a keyframe at the last frame in the clip to 1800° (5 x 360°). Exactly five full waves form over the duration of the clip.
- If you want a static (not animated) distortion, set Speed to 0 and do not animate Phase.
Wave Angle sets the angle between the direction of wave motion and the horizontal axis.
Chaos Parameters
The Chaos parameters control shape of the waves, change the look of the waves by adding distortion or chaos, or create the appearance of waves that dissipate as they move.
The WaveForm menu setting determines the shape of the wave. These choices fall into two categories: Shape waveforms and Spectrum waveforms.
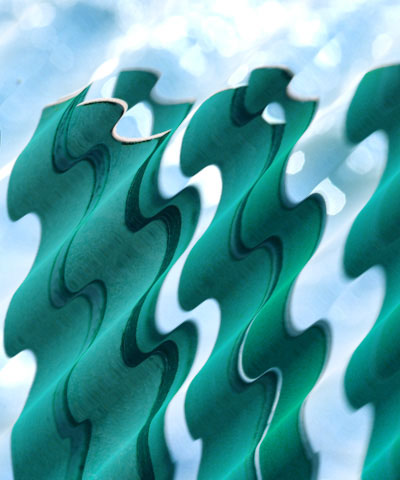
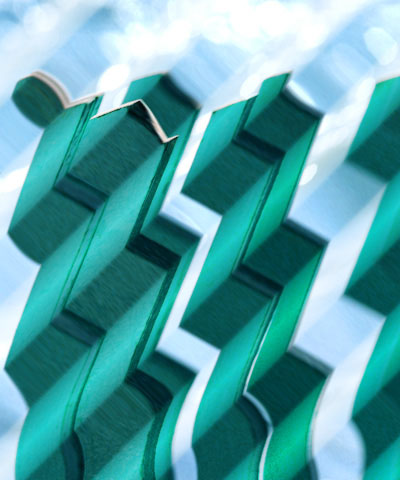
The Shape waveforms include Sine, Triangle, Square, Sawtooth, Circle, Semi-Circle, Uncircle, and Half-Sine. These names refer to the shape repeated on a graph that plots the displacement of each point in the wave on the Y axis and the distance of each point from the center on the X axis.
 |
 |
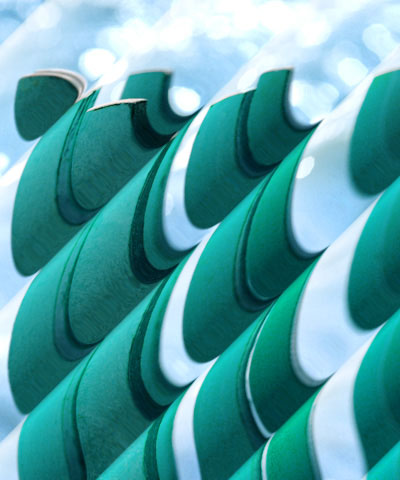 |
| Circle Waveform | Triangle Waveform | Semicircle Waveform |
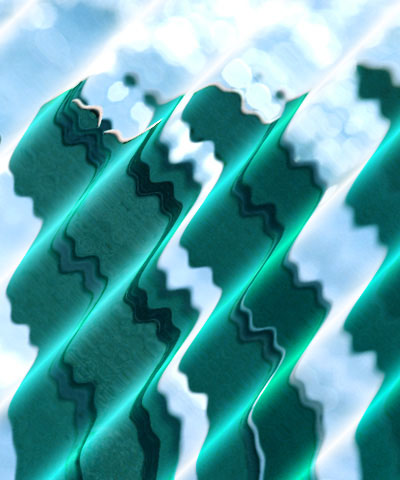
The Shape waveforms are mathematically derived and are not intended to look natural. For a more natural-looking alternative, experiment with the Spectrum waveforms. These waveforms are all variations of the sine wave that can produce less regular, more realistic looking waves.
 |
 |
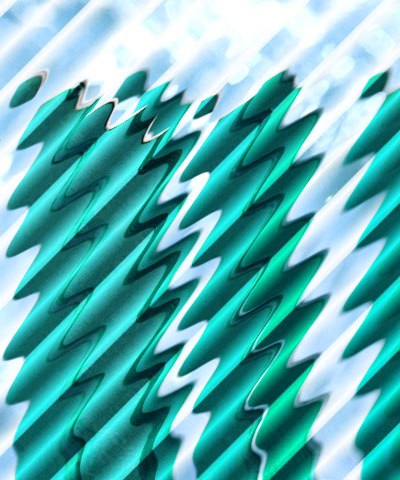 |
| Spectrum 1 Waveform | Spectrum 4 Waveform | Spectrum 10 Waveform |
The Chaos Wave’s waveform is determined by the Chaos Wave value, which relates to the fourteen Spectrum waveforms listed in the Waveforms menu in the Basic tab. A Chaos Wave value of 10 uses the Spectrum 1 waveform as the Chaos Wave, 20 uses the Spectrum 2 waveform, and so on. Values between two multiples of 10 create a mix of the two adjacent Spectrum waves.
Chaos Blend controls the mix of the specified waveform (determined by the WaveForm menu) with the Chaos Wave setting. If Chaos Blend is set to 0, the resulting wave conforms to the WaveForm setting. At a Chaos Blend value of 100, the filter uses only the Chaos Wave. Intermediate values blend between the two. You can change the Chaos Blend value to adjust the amount of chaos added to the basic waveform.
Wave Distortion distorts the shape of the wave, changing the displacement of pixels that are not at zero points (for positive values) or peaks (for negative values) in the wave. A zero point is a point in a wave which is not displaced; if you image a waveform drawn on a graph, the zero points are the points at which the wave crosses the horizontal axis.
The Peak Point and Decay Distance interact to produce a wave that decays as it moves. As the wave advances, it stays at full strength until it reaches the Peak Point, beyond which it decays until it hits the Decay Distance, where it levels out.
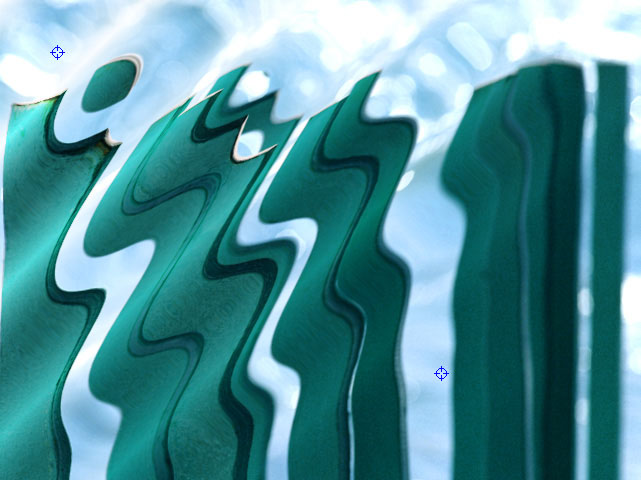 |
Peak Point: Top right of image
Decay Distance: Middle right point of image
The amount that the wave decays is controlled by Decay, which sets the ratio of the wave’s strength at its lowest point (at the Decay Distance) to the wave’s
strength at its highest point (the Peak Point).
The Intensity menu includes three settings: Low, Normal, and High.
- Normal has no affect on the Height and Perpendicular Height settings and is suitable in most circumstances.
- Low scales down the Height and Perpendicular Height values by a factor of 10, which can be useful if you are working with small waves and want fine control over the parameters.
- High multiplies the Height and Perpendicular Height values by a factor of 10 and can produce very exaggerated and unnatural-looking wave effects.
Light Parameter Group
The Light parameters adjusts the lighting of the wave in the filtered image.
Light Level controls the amount of light applied to the image. At a value of 0, no light is applied. As the value increases, the light becomes more intense.
Light Color sets the color of the applied light.
Light Width affects the size of the lit area on the wave crest. Increasing this value causes a wider part of the crest to be lit; decreasing it diminishes the lit portion of the wave.
Light Focus adjusts the shape of the light over each wave. Increasing Light Focus causes the light to look wider and more diffuse; decreasing Light Focus makes the light bands sharper and narrower.
Ambient Light adjusts the diffuse light on the image. The default setting of 100 does not add or subtract ambient light from the source image. Decreasing this setting makes the image darker before the other light is applied. Ambient Light illuminates or darkens the image evenly, and is unaffected by any other lighting parameters.
- The PixelChooser does not affect the Ambient Light setting. Ambient Light is applied to all pixels. This ensures that the PixelChooser does not create discrepancies in the overall lighting of the image before Wave is applied. Thus, at the default Ambient Light value of 100 (where no ambient light is added or subtracted), the PixelChooser behaves exactly as in other filters; at other values PixelChooser filters every parameter except Ambient Light.
The Apply Mode menu controls how the filtered image is composited with the source image. For descriptions of all the possible Apply Modes, Click Here.
PixelChooser
The BCC PixelChooser provides simple, built-in masking of the effect result. The PixelChooser is generally used to select a portion of the image and restrict an effect to just the selected area while maintaining the original image content in unselected regions. The selection can be based on geometric shapes or on the image’s luma/color properties.
For more information on the PixelChooser, Click Here.
Distortion Pinning
The BCC Distortion Pinning controls are used to fine tune edge treatment in situations where a distortion effect might cause regions from outside the image edges to be remapped inside the boundary.
For more information on the BCC Distortion Pinning controls, Click Here.
Beat Reactor
The BCC Beat Reactor is an animation control suite which drives effect properties based on the contents of an audio track. This lets you seamlessly tie visual FX to an audio soundtrack without the need for ANY manual keyframing.
For more information on the Beat Reactor, Click Here.