Working with the Text Tool
A new addition to Title Studio in Continuum 2019 is the Text Tool. While previously text could be created and edited using the Text Generator window, with Continuum 2019 you can use the Text tool to type text directly over the image in the Composite window. The Text tool is located in the Tool window and supports typing in English characters as well as Japanese, Chinese and Korean.
When you create text with the Text tool, a new Text track appears at the top of the timeline and offers the same controls as any other Text track. The Text tool is most useful when you want to accurately position text over a background image.
You can use the Text Generator Window or the parameters in the Controls window to format the text. But be aware that the Text tool does not allow you to import text. Instead of importing files, you can paste text that you have copied from another program. To paste text, press Control-C. However, style setting in the original file are not retained.
Using the Text Tool
If the Tools window is not enabled in your specific layout, you can access it by:
- Selecting Window —–> Show Tool Window to open the Tool window, or pressing Control-6.
- Click to select the Text tool or press T.
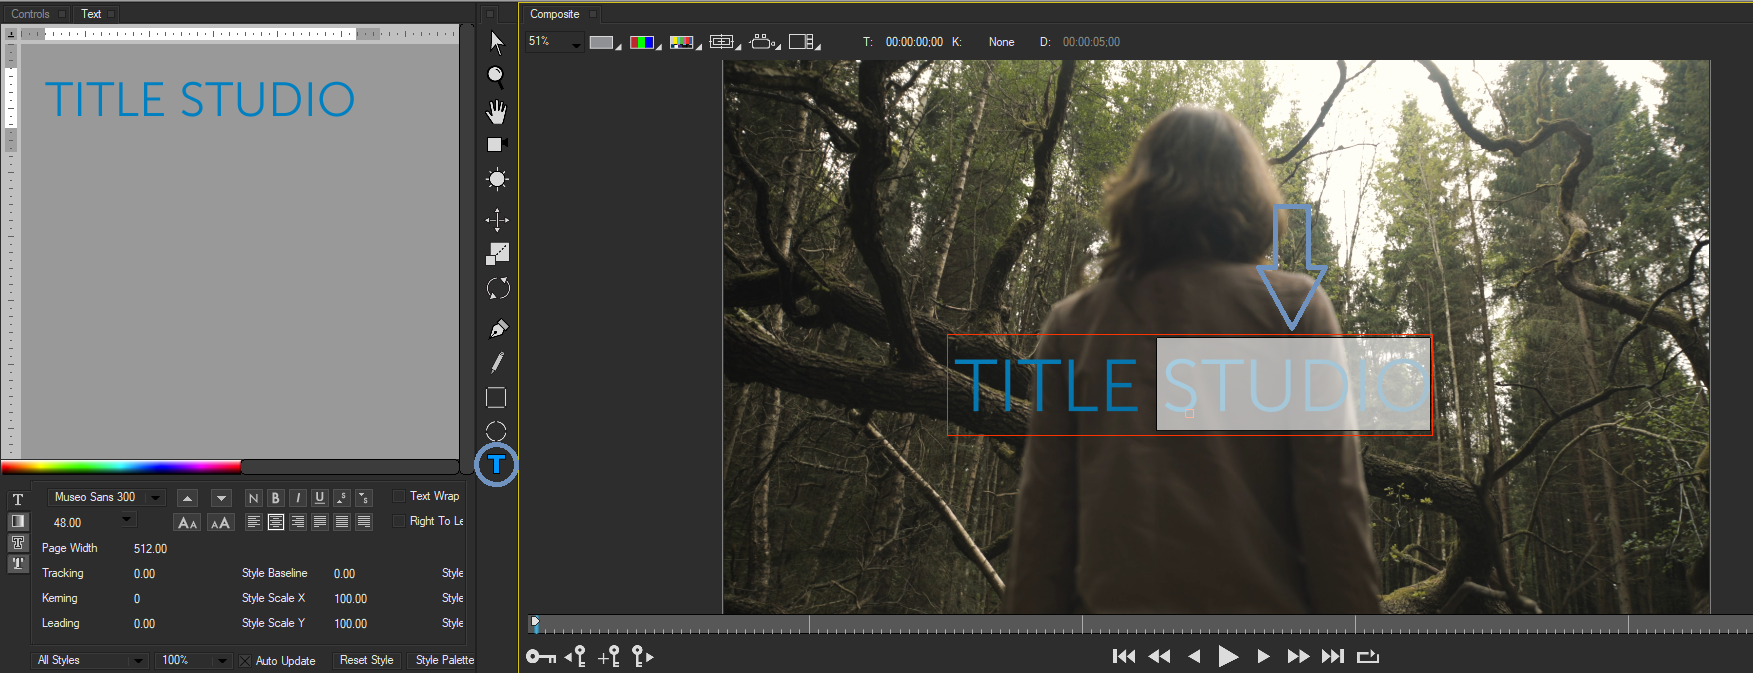
- Click in the Composite window where you want to add text and begin typing.
The text appears in the Composite window with the last used text style. A small square appears on the text selection outline. This is the Baseline Indicator which indicates the text baseline and justification.

In this example, the text is Left Justified so the Baseline Indicator appears on the left side of the selection outline.
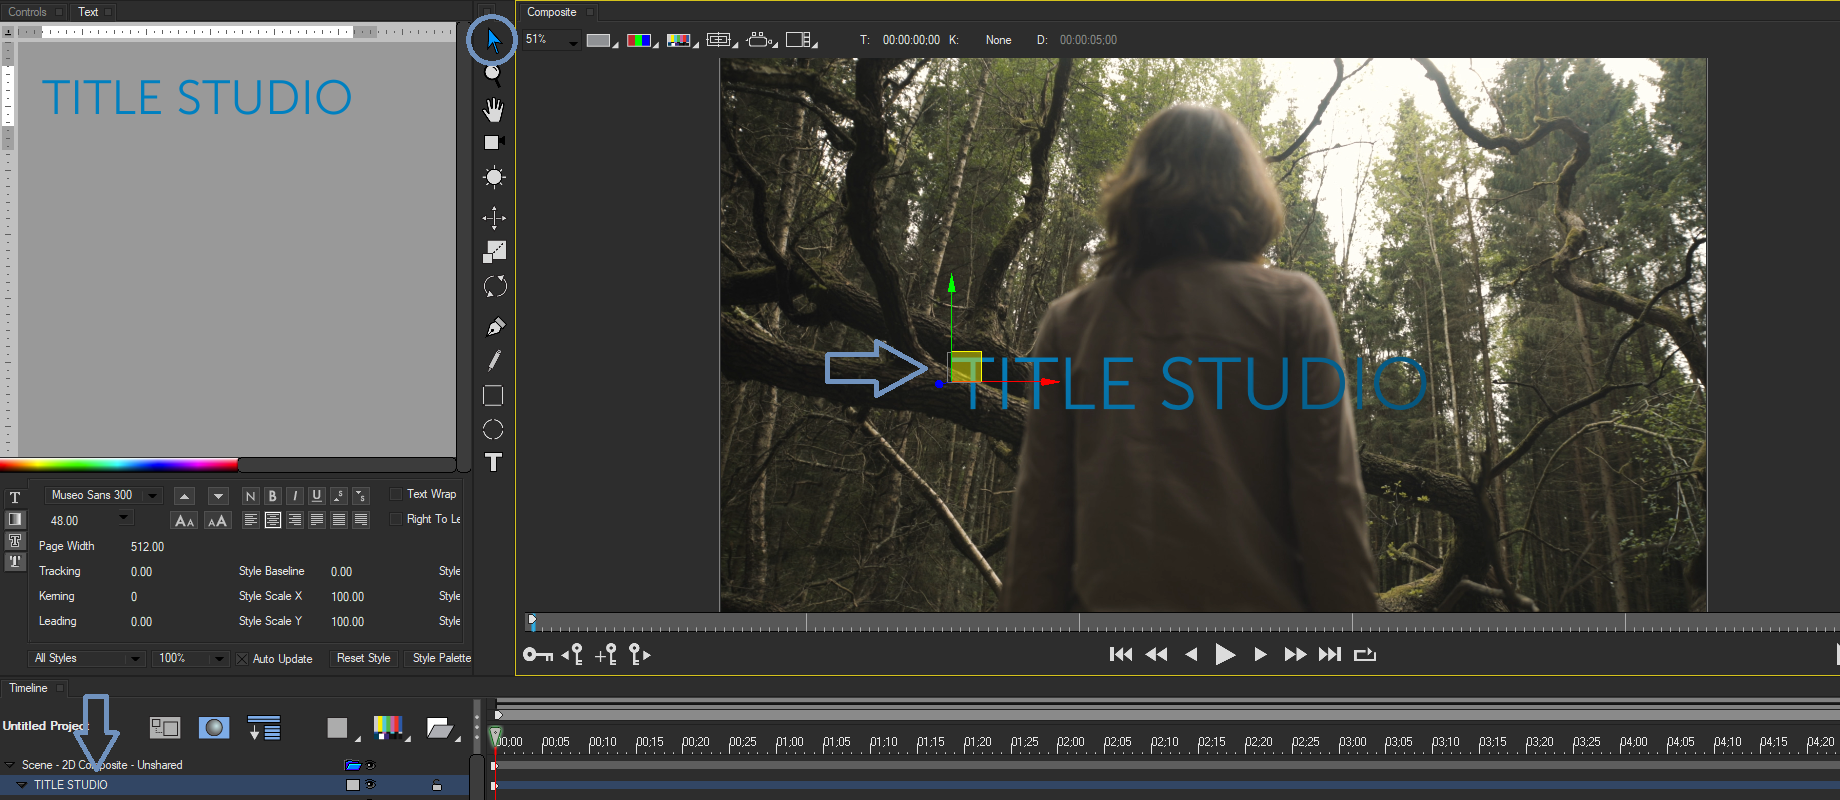
To reposition the text, make sure that the Solid Arrow tool is selected in the Tool window and the Text Track has been selected in the timeline. Title Studio’s interactor will appear in the Composite Window allowing you to reposition the text.
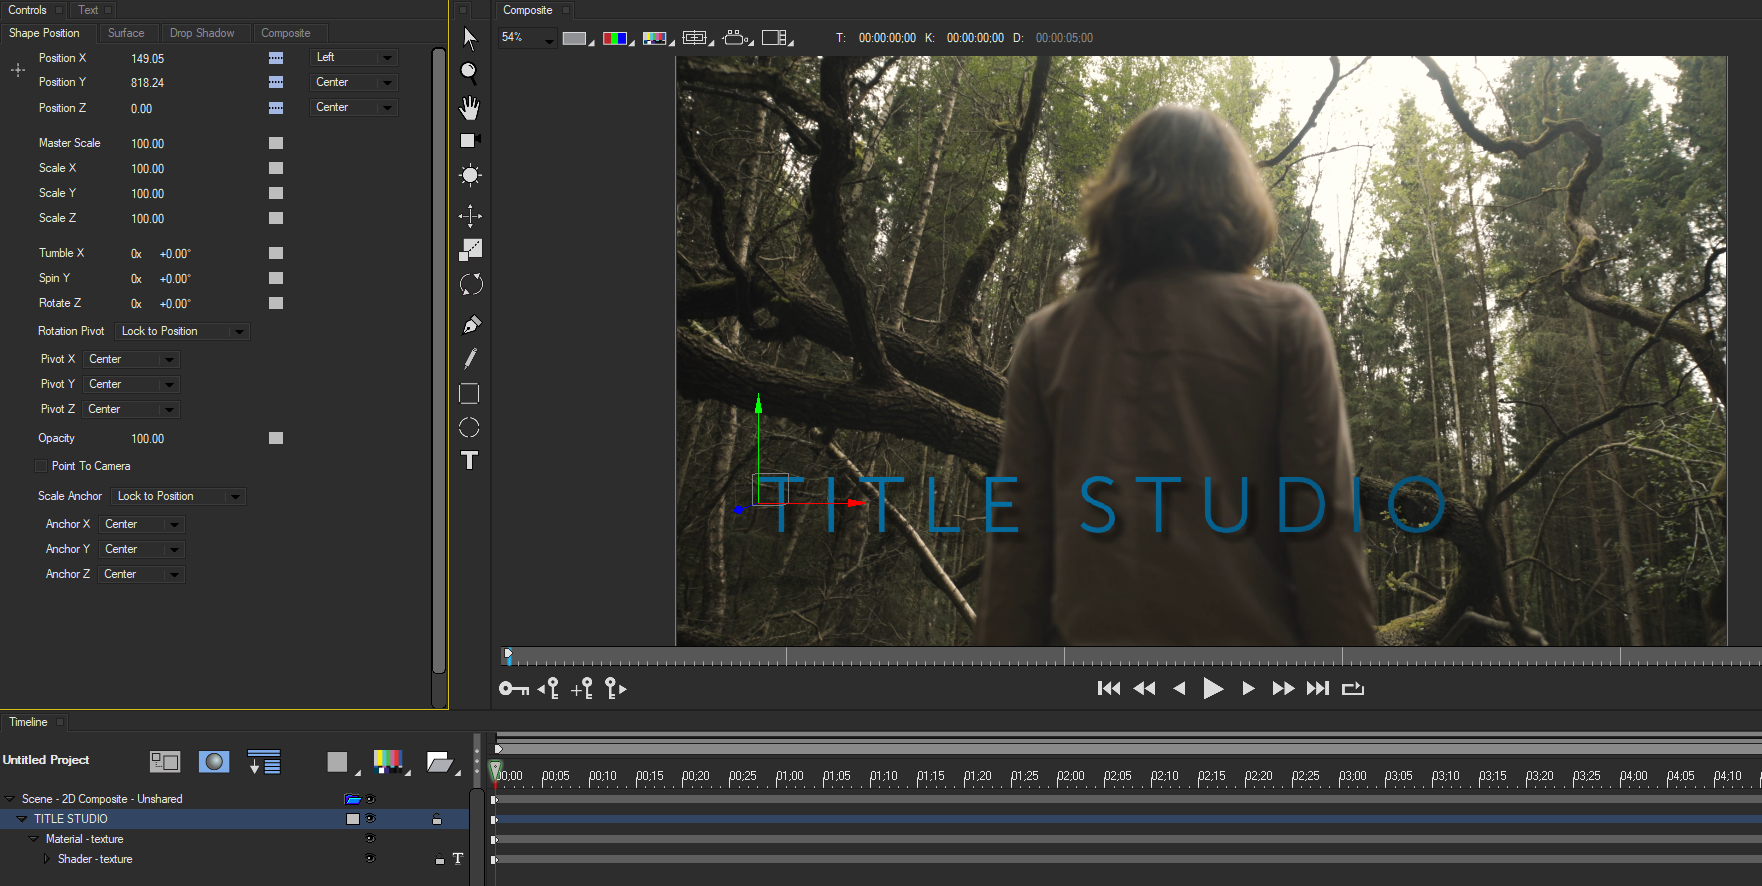
If you want to animate the text position, use the Position controls in the Position tab in the Controls window.
Editing Text
You can edit text that was created with the Text tool by using the Text tool to select the appropriate characters.
Text created with the Text Tool can be formatted by selecting the Text Generator window in the same way traditional text tracks can be updated. If you select specific characters in the text with the Text Tool, any changes made in the Text Generator Window will affect only the selected text. If no text is selected, changes made will affect the entire text track.
Of specific note, however is Kerning, which adjusts the spacing, in pixels, between selected characters without affecting the text globally. Some applications refer to this as pair kerning. To adjust the kerning, use the Text tool to select the characters. Press the Alt key and the Left or Right Arrow keys to adjust this setting in increments of 1.
Justification of Text Tracks
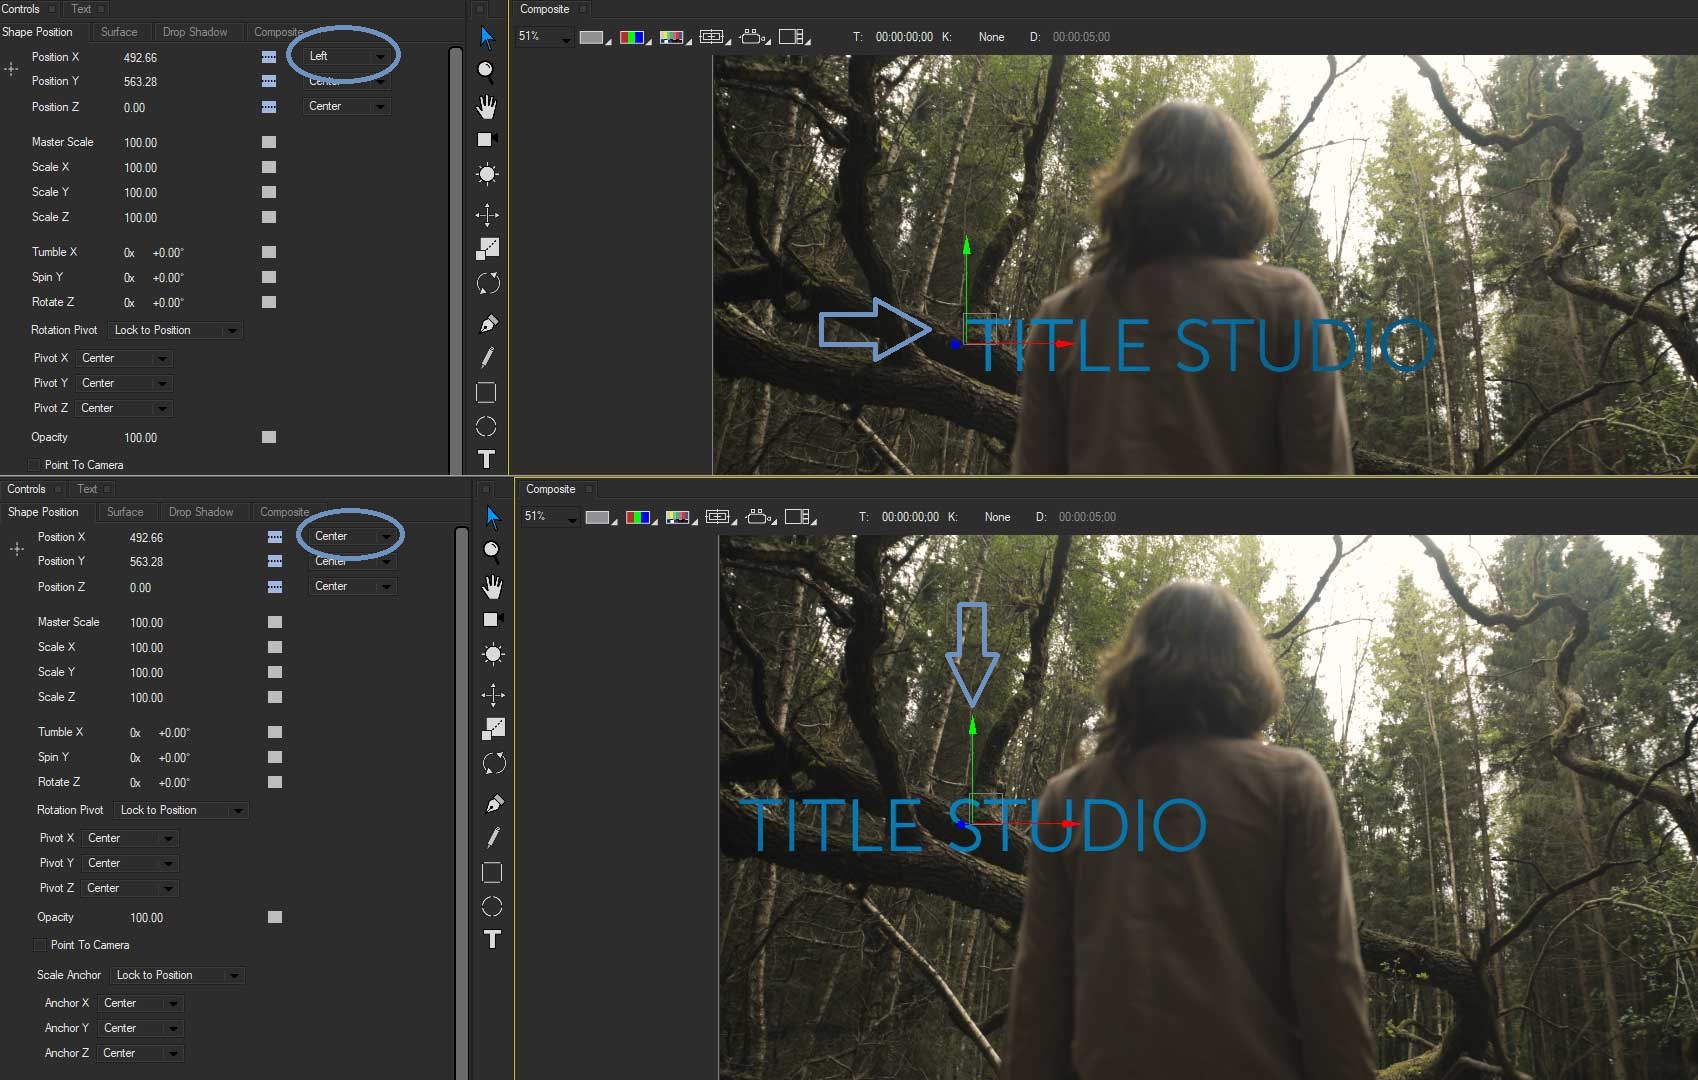
When you create a text track using the Add New Media tab, the generated text is always center justified. The Composite Window Interactor will be located at the center of your text, and all transformations will affect yoru text from the central point. However, when you use the Text tool to create text, the text is justified from where you first start typing. In the following example, the text was Left Justified when it was typed. Although it appears centered in the Composite window, the Interactor indicates that the text is actually Left Justified.
When the justification is changed to Center Justified, the text is centered around that point, so it moves to the left.
Justification affects the text differently depending on whether Word Wrap is enabled. If Word Wrap is enabled, the text justifies within the Composite window. If Word Wrap is not enabled, then the text justifies within the text box, but the text page is still centered within the Composite window. You can enable Word Wrap in the Transform tab or in the Text window.


