Overview
Introduced with Continuum version 10. BCC Title Studio is our next generation 3D Titling and Animation plugin allowing quick and easy creation of 2D/3D titling and motion graphics (including C4D model import) directly inside the host of your choice. Title Studio is located in the 3D Objects category and is 100% GPU accelerated using an advanced OpenGL graphics engine for fast, accurate rendering. Title Studio supports a custom UI to enable a vastly richer motion graphics toolset than can be achieved with just native host parameters. Yet, in addition to that flexibility and power, it offers very simple browsing, applying, and customizing pre-made animation presets/templates using the FX Browser. Users of After Effects, HitFilm, and Nuke can take advantage of tight integration with the native host 3D camera and lighting systems in addition to the filter’s own built-in 3D camera and lighting options that are available across all hosts.
Native Host Compositing
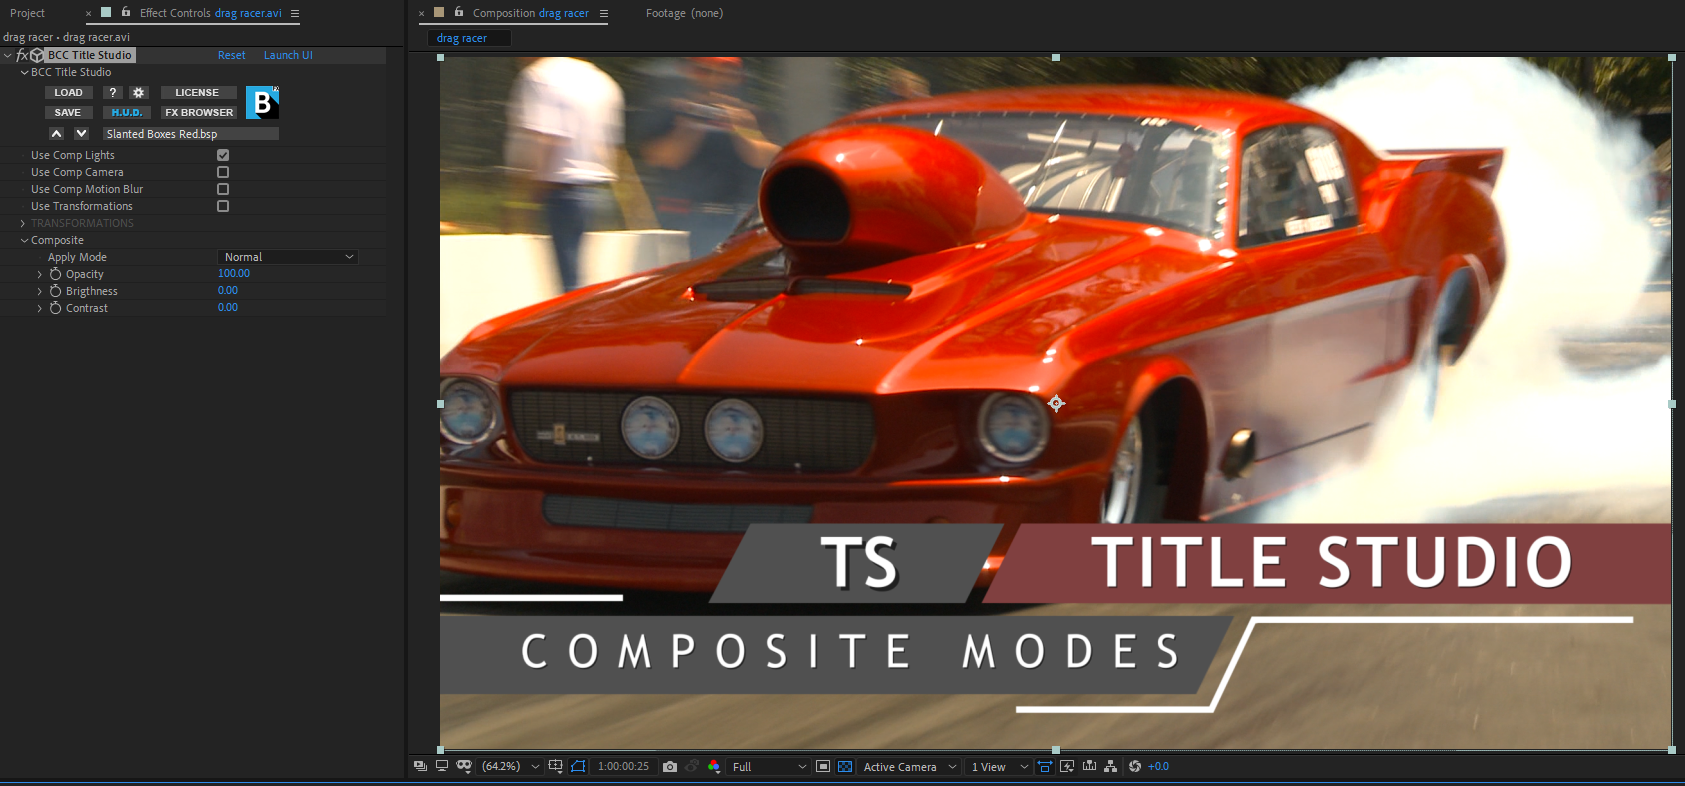
New in Continuum 2020.5, Title Studio introduces native host compositing controls, which add a more efficient and streamlined workflow to title creation.
Located in the host’s effect panel, Compositing controls allow you to directly composite Title Studio on the source clip with apply modes and opacity controls. This eliminates the need to duplicate your source clip in the timeline.

Apply Modes can be used to apply the Title Studio render directly to the source image. Users can now control the blending of the two images, giving title effects unlimited creative possibilities. For additional information on each of the available apply modes, please click here.
- Opacity: adjusts the opacity of the title effect. Increasing the Opacity setting makes the title more opaque, and decreasing the setting makes the title more transparent.
- Brightness adjusts the brightness of the title effect. Increasing the Brightness setting pushes colors toward white, and decreasing the setting pushes colors toward black.
- Contrast adjusts the contrast of the title effect. Increasing the Contrast setting pushes colors toward pure colors, and decreasing the setting pushes colors toward 50% gray.
Training and Tutorials
Basic Tutorials
New users should take advantage of the Title Studio Basics, which provides a series of exercises designed to provide you with step-by-step instructions for creating various kinds of basic effects, while exploring many aspects of the Title Studio interface and functionality. These exercises are a good starting point to help familiarize new users with Title Studio, and each tutorial builds on many of the steps and techniques introduced.
Advanced Tutorials
More advanced tutorials covering complex topics such as creating 3D Logo Animation, Working with Depth of Field, Designing a Broadcast Motion Graphics Opener and more are available in the training section of the Boris FX website. These videos are updated regularly to provide useful tips and tricks on the various aspects of the software.
Navigating the Title Studio User Interface
Applying the Title Studio Filter
Apply the Continuum Title Studio filter just as you would any other filter in the supported host in which you are working. Please note that the output from Title Studio will completely override the filtered source, so best practice for this effect is to place it on a duplicated version of the underlying clip. Following this method will enable you to work with text elements while viewing the filtered source.
Overview
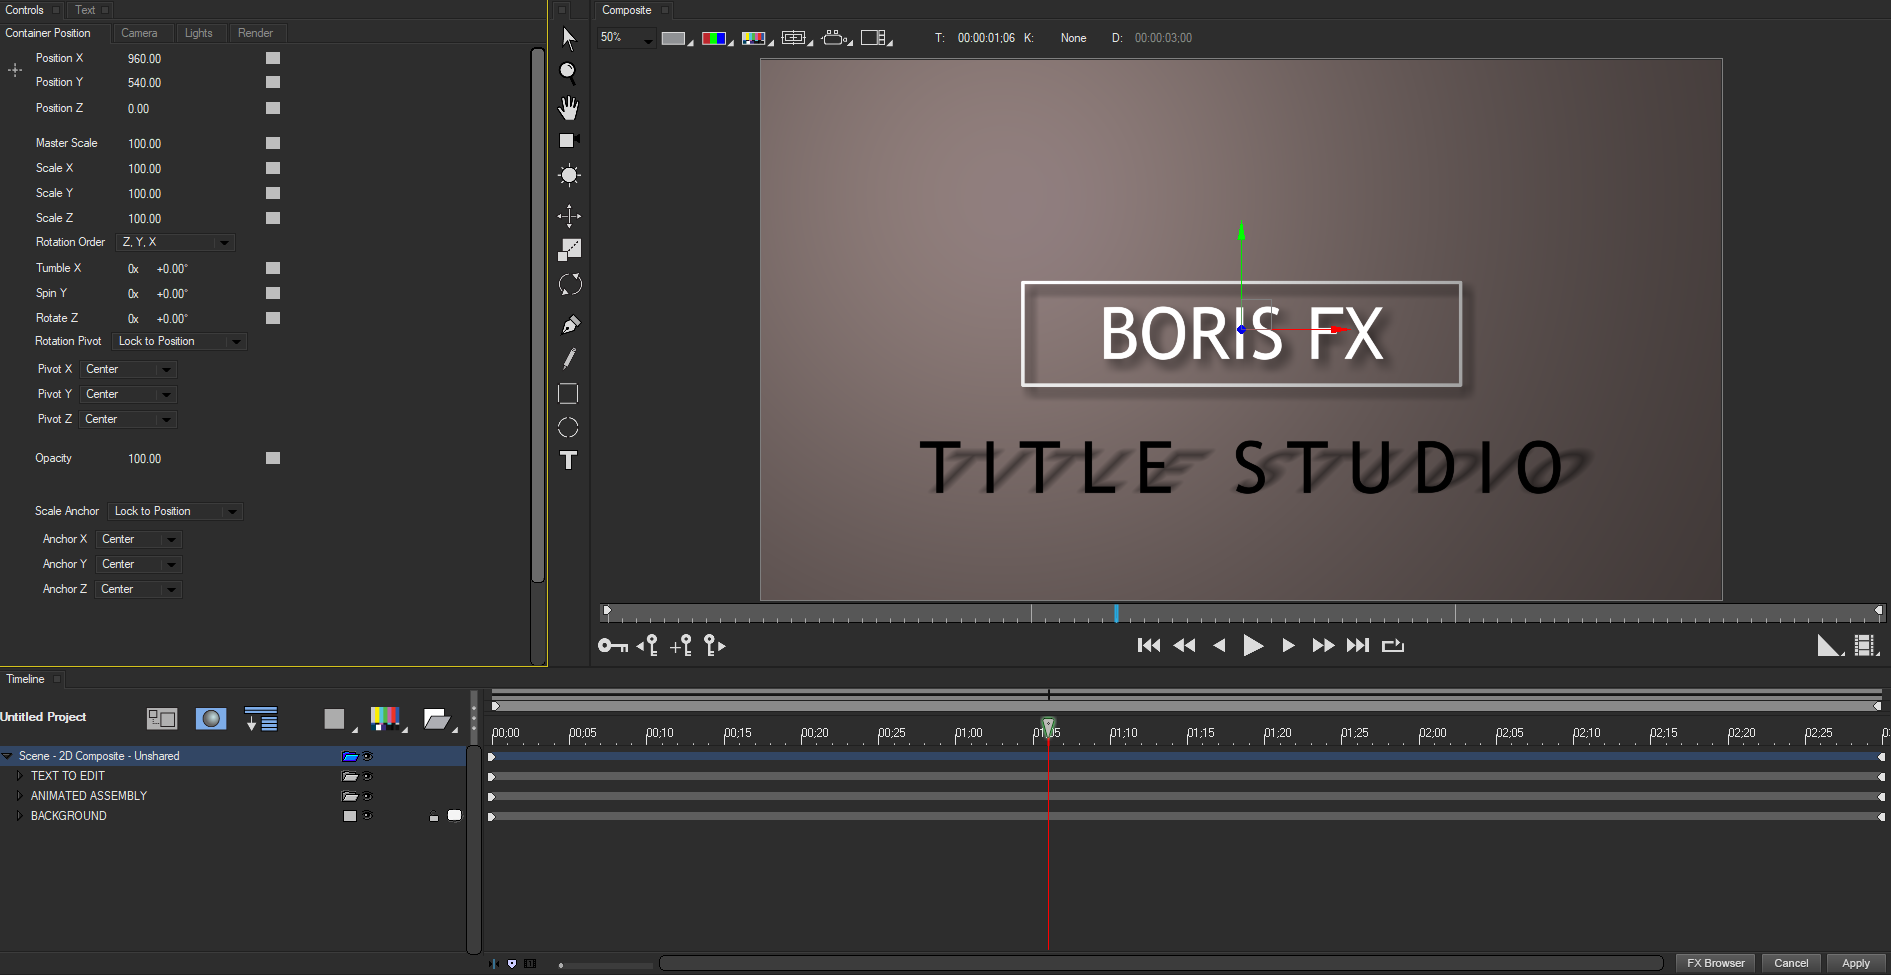
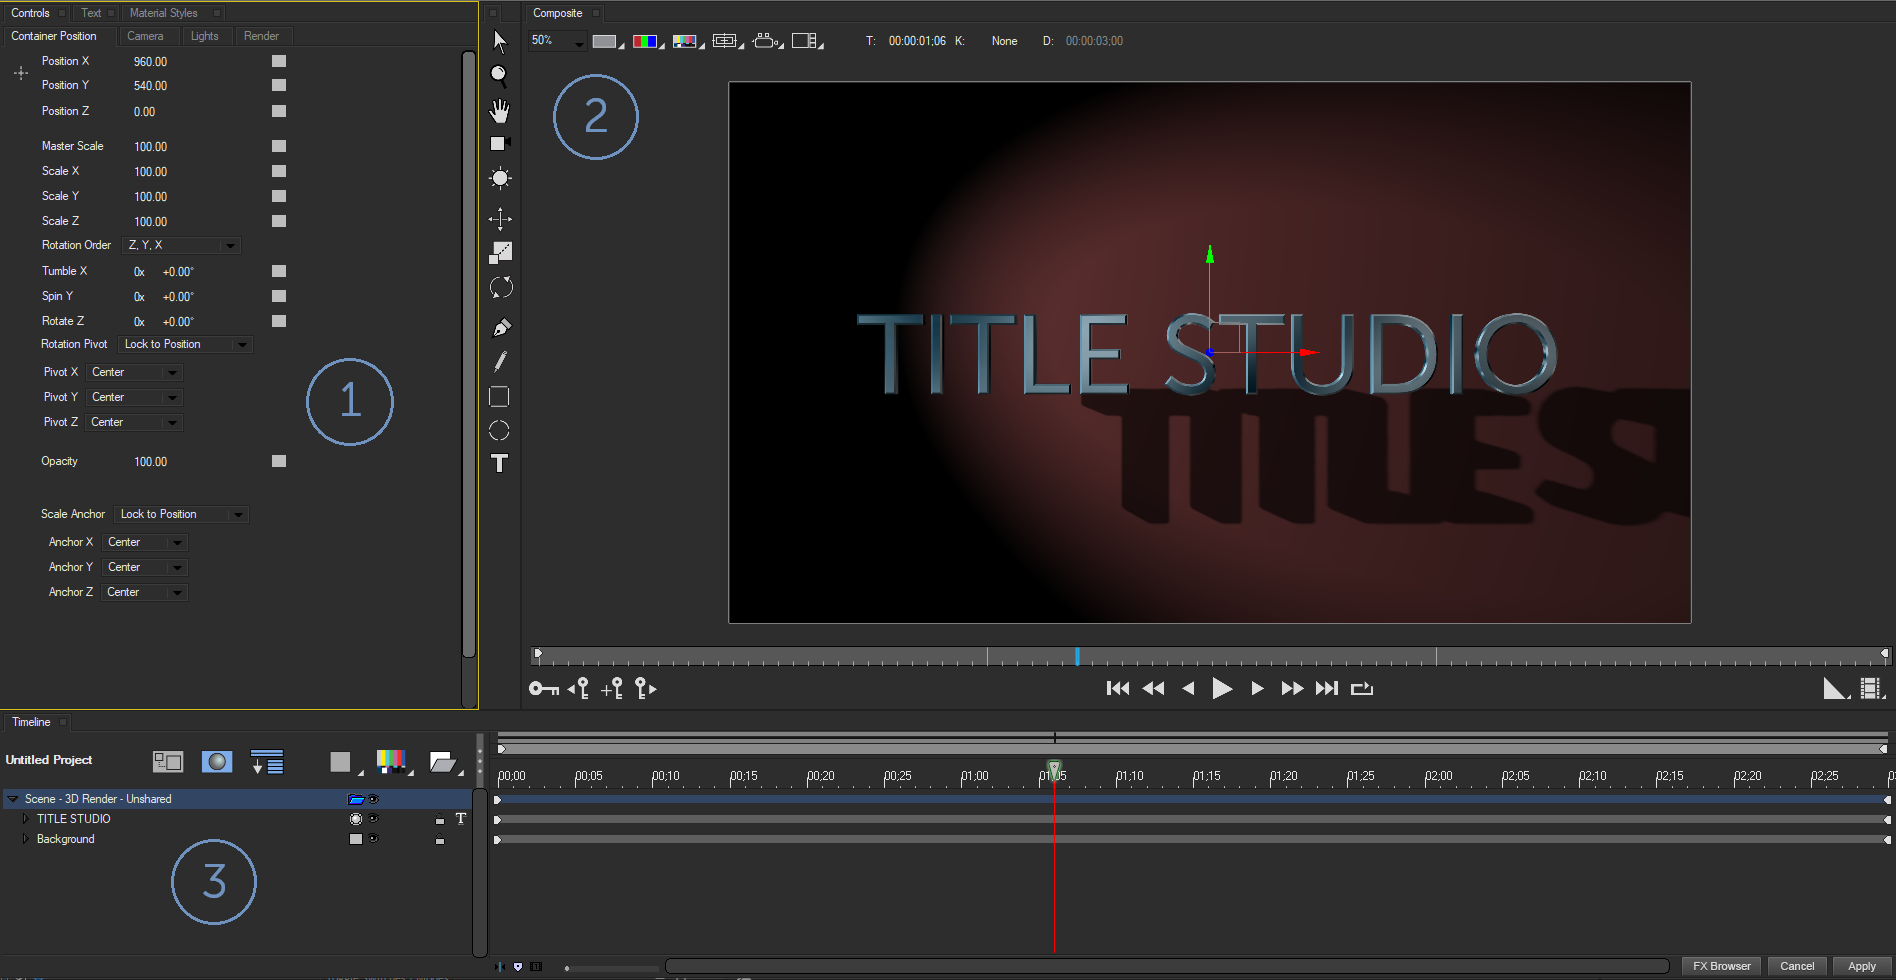
In this section we will introduce the three primary windows (Controls, Composite, and Timeline) used in Title Studio to create, animate, and preview effects. In addition, this section covers the Preferences Panel, which contains user interface settings, the Project Panel, which allows you to adjust project settings, and the various tabs in the Style Palette, which allow you to apply, save and categorize styles for text, color, gradients, materials and extrusions for future use.
-
Controls Window.
The Controls Window displays animatable parameters for each layer or element in the timeline, and is organized into multiple user selectable tabs. The visibility of these context-aware tabs is dependent on the element that is currently selected in the Timeline Window, as all elements in Title Studio have parameters that are specific to that type of shape or media element. The Controls Window allows you to adjust the values for each visible parameter over time and to choose how to interpolate those values between keyframes.
-
Composite Window
The Composite Window displays the composited result as it will appear in the host timeline. It includes on-screen controls for the current selected object in the timeline that allow you to interactively manipulate an object’s position, scale, rotation and animation. The Composite Window includes an array of buttons with drop down menus for various options, including quality, resolution, zoom, keyframing options, visible channels, views, cameras, title safe overlay etc.
-
Timeline Window
The Timeline Window contains all of the media elements that are being used in the current composite and this is where new media elements, such as text or other 2D or 3D shapes, are added to the current project. Parameters related to any object selected in the timeline are displayed in the Controls Window and the output from the Timeline Window is displayed in the Composite Window. All of the layers in the Timeline have sub-layers, which are made visible by clicking on the triangle to the left of all elements in the timeline.
Setting up Projects and Adjusting Preferences
In this section, we will look at the various settings available in the Project Setting window, as well as the Preferences panel, which allow for detailed customization of both your project as well as the User Interface. NOTE: All tutorials and examples in this guide are based off of the default Title Studio layout and project settings.
The Project Settings Window
The Project Settings Window, accessible from the Edit pulldown menu, allows for customization of project size, duration, frame rate and other features. When Title Studio is launched from any supported host, such as Avid Media Composer or Adobe Premiere Pro, many of these parameters are automatically pulled directly from the host itself, so that it matches the original composition
The Preferences Panel
The Preferences Panel, accessible from the Edit pulldown menu, contains controls to customize the look and feel of Title Studio. In addition to the basic UI layout, various rendering features may be adjusted, hot keys can be assigned and GPU information can be reviewed.
Working With the Tools and Info Windows
The Tools Window
The Toolbar contains a number of tools which can be used to interact with objects in the timeline. There are also options to quickly switch views so that you can more easily interact with cameras or lights in the scene. There are also content creation tools such as geometric primitive shapes, the pen top for user defined path shapes and the new on-screen text tool.
The Info Window
The Info Window contains detailed information on various aspects of your project including color values, render speed and the x/y co-ordinates of the cursor.
The User Marks Window
The User Marks window provides the ability to create visible markers in the timeline, which can include notations or other information pertaining to the animation at particular points in time.
The History Palette
The History Palette provides a visible history of all the actions that you have made in the timeline and Controls window.
The Keyframe and Grids/Guides Palettes
Both of these palettes are contained in the Options Palette. The Keyframes palette is used to control the default interpolation of keyframes in the timeline. The Grids / Guides palette is used to control the guides and guides, including the style, color, spacing, snapping etc.
Working with Tracks and Parameters
In this section, we will look at the various track types and parameters available in Title Studio. Parameters are track specific and will only be displayed when a specific track is selected. Before exploring the various parameters, new users should take a moment to review the basics of track structure in Title Studio. Users who are familiar with Boris Red and Blue may wish to also review these guides as well.
Understanding Track Structure
Every effect in Title Studio is made up of multiple tracks. The basic track types include 3D Container tracks, Title Container tracks, Shape tracks and Material tracks. Each track type is briefly covered in the following section
The Scene Container Parameter Guide
In this section we will cover the various tabs and parameters that are available in Title Studio when the Scene Container is selected. The information in this section applies to specific parameters available to Scene-Level containers.
The Title Container Parameter Guide
In this section we will cover the various tabs and parameters that are available in Title Studio when the Title Container is selected. The information in this section applies to specific parameters available to aid in the creation of credit rolls, type-on animations and other title effects.
Working with Image Processors
In this section we will cover the various tabs and parameters that are available in Title Studio when Image Processors are applied to an object. Image Processors are new to Continuum 2019 and allow you to create complex, realistic effects in real time. They are not compatable with earlier versions of Title Studio


