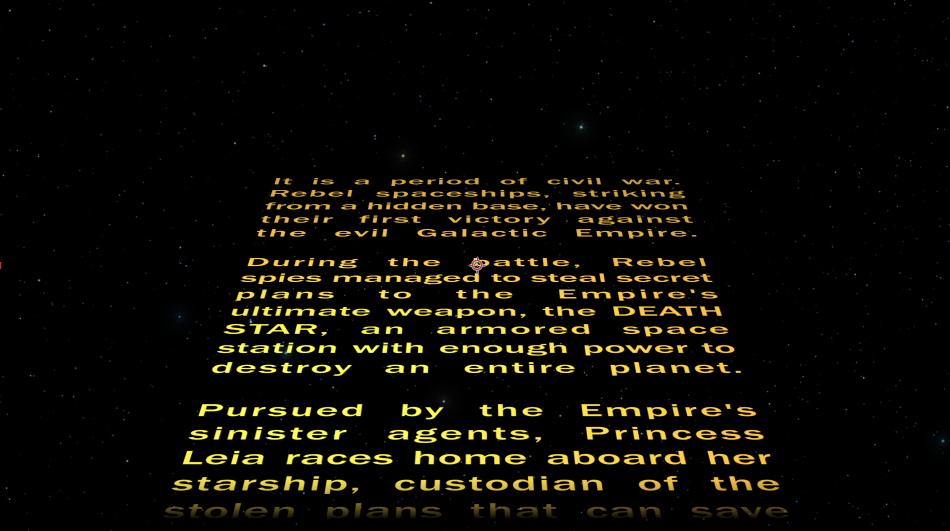
When creating a full length Credit Roll manually entering in every member of the cast and crew may not be practical. The list may simply be too long, or you may need to get someone else’s approval. Title Studio can help make this easier by allowing you to import your data from a text or RTF document. But because you can import virtually any text data, you are not limited to simply importing credits. In this tutorial we explore techniques for importing text data, and creating additional pages to recrate one of the most famous credit rolls in history.
The opening scrawl to Star Wars.
Now, creating this effect is actually pretty simple. In fact it only takes three steps:
- Create Our Text
- Use a Title Container to Animate the Roll
- Tumble the scene container back in 3D Space to create that distinct look.
That’s it. Honestly.
But like anything, there are a few simple techniques that we need to be familiar with before we can create the effect. Many of those techniques can be found in Part One of this tutorial. It is recomended that you review those techniques before proceeding.
Now, the first thing we want to focus on is importing our text.
As many a film-goer will know, the opening to the original Star Wars goes something like this:
It is a period of civil war.
Rebel spaceships, striking
from a hidden base, have won
their first victory against
the evil Galactic Empire.

During the battle, Rebel
spies managed to steal secret
plans to the Empire's
ultimate weapon, the DEATH
STAR, an armored space
station with enough power to
destroy an entire planet.

Pursued by the Empire's
sinister agents, Princess
Leia races home aboard her
starship, custodian of the
stolen plans that can save
her people and restore
freedom to the galaxy.....
Now, certainly it would be easy to just copy and paste that into Title Studio, but again, when dealing with longer text files, or those that need to be approved we want to import the data from an existing document.
Step One: Importing the Text
- As shown in Part One, begin by creating a new text page with Ctrl+Shift+T, or by selecting an existing text track.
- In the text window, choose to Import File, and then select your text document. Title Studio will then import your text along with the tab stops from the document.

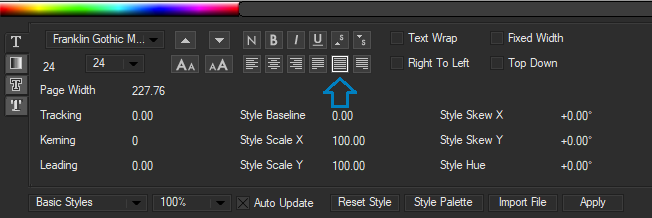
TIP: remember to close your document before importing it into Title Studio.Title Studio will preserve the formatting of imported text files, however we will need to make a few changes. The official font used in Star Wars is Franklin Gothic Demi (Bold). While the Franklin Gothic Family of fonts are premium paid fonts, some of them are available to users for free. Windows users will find that Franklin Gothic Medium is bundled with their OS, and Adobe Creative Cloud users have the font available via type kit. For the images in this tutorial, we we used Franklin Gothic Medium, but feel free to use whatever font works best for you. - In the text generator window, adjust the Font Size to 24
- Next, with the text selected, click the Full Justification button. This will align the text to the newsprint style format seen in the films.
- Lastly, select the Color/Gradient tab to bring up the font color settings
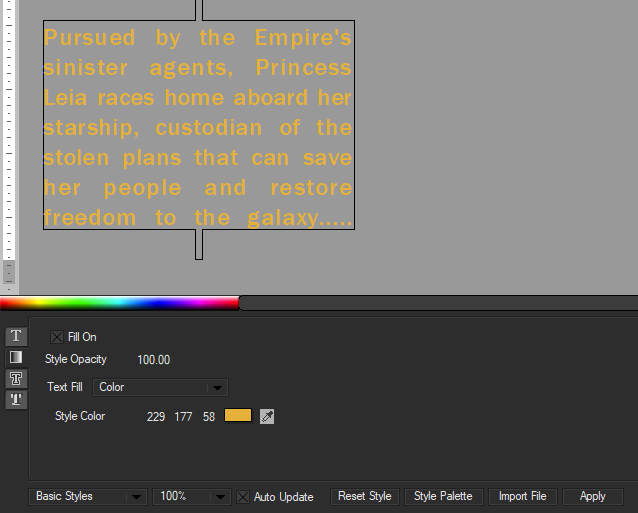
 Here, we can select the Font Color or Gradient. To change the color, simply click on the color chip. enter the RGB color values, or use the eyedropper to select the color.
 - To recreate the official Star Wars font color, we want to enter the values of Red: 229 Green 177 Blue 58 into the fields
Step Two: Animating the Title Roll
Creating the Title Roll itself, is simple, and we will follow the same steps from Part One.
- Select the text page with our famous opening text.
- We can create a new Title Container by either selecting it from the Add New Container button, or by pressing Ctrl+Shift+T.
 Doing this will create a new Title Container within our scene, and place our text inside of it, allowing us to modify the animation settings independently from our scene settings, which we will cover in a moment.
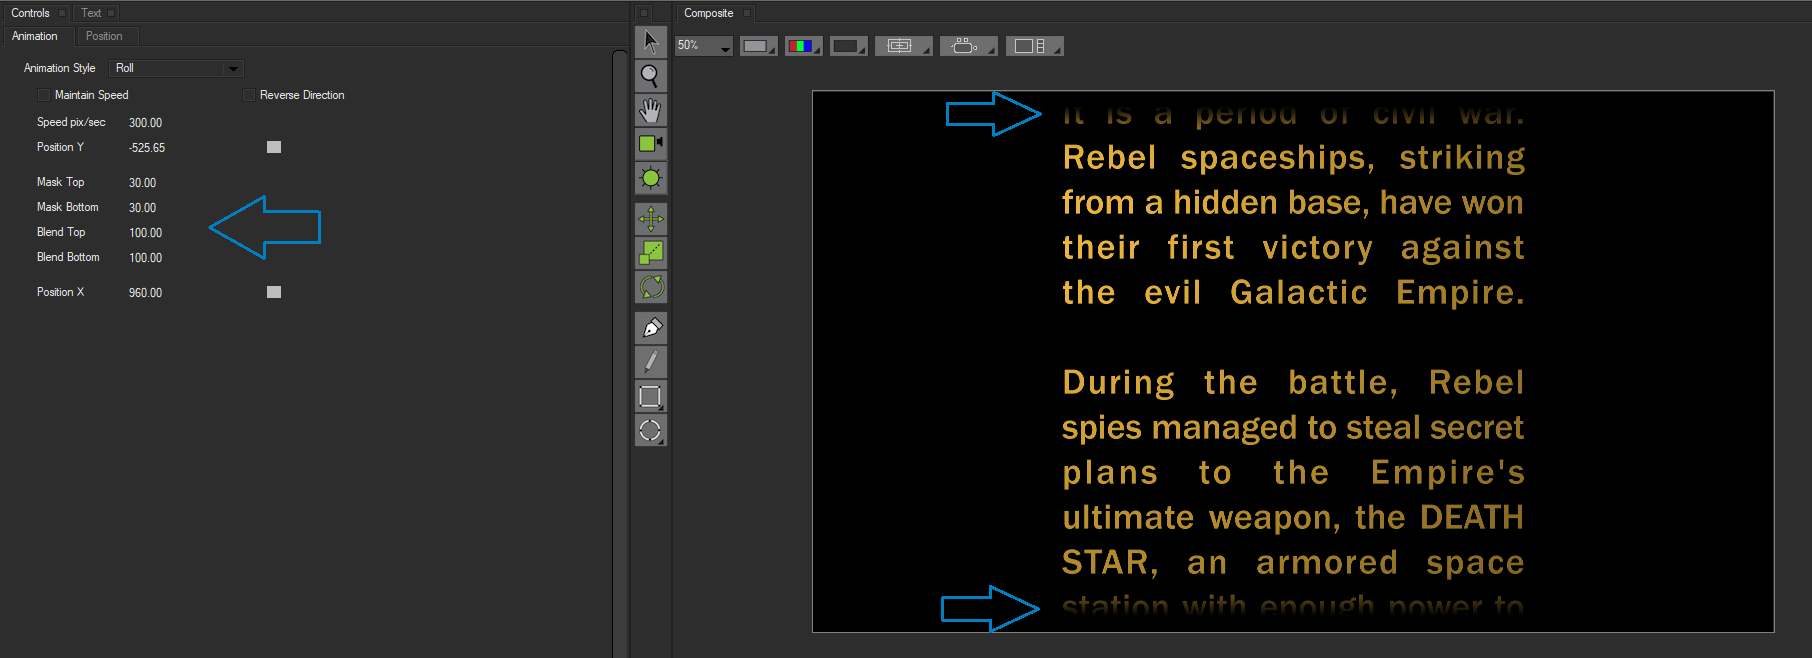
 - In the Animation Tab, select Roll from the dropdown menu.
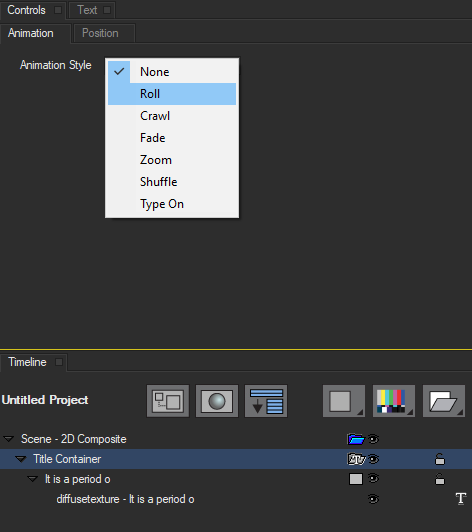
- If we play the effect back, we can see that the roll’s in and out points are automatically set to correspond to the length of our effect. If we change the length of our effect, the roll automatically adjusts. Change the text, and the roll automatically adjusts.
- As we did in Part One, let’s add a soft-edged mask at the top and bottom of the roll. By setting the Mask Top and Mask Bottom to 30 and the Blend Top and Blend Bottom to 100, our text will fade in as it enters the frame, and out as it exits the top.
Step Three: Finalizing the Effect
While Title Containers make it easy to animate titles, we need a 3D Container to complete this effect. Fortunately, Title Studio automatically created one for us when we created our text track. When we created our Title Container, Title Studio placed that container inside of the 3D Scene Container. This makes the final part of our effect very easy.
3D Containers allow us to composite any element in three-dimensional space. To make adjustments, simply select the Scene Container. Now, you’ll notice that in this example my Scene Container indicates that this is a 2D Composite. More information on Composite Modes in Title Studio may be found here. For now, though, it does not matter if the scene is in 2D or 3D composite mode because we are only working with a single text track.
The most distinctive part of the Star Wars-style animation is that the roll is tumbled back in 3D space, and that’s just what we’ll do here.
- With the Scene Container selected, the Control Panel will update to provide our Container Position Parameters. These parameters allow me to change the position, scale and orientation of everything within my Scene Container, which includes our Title Container.
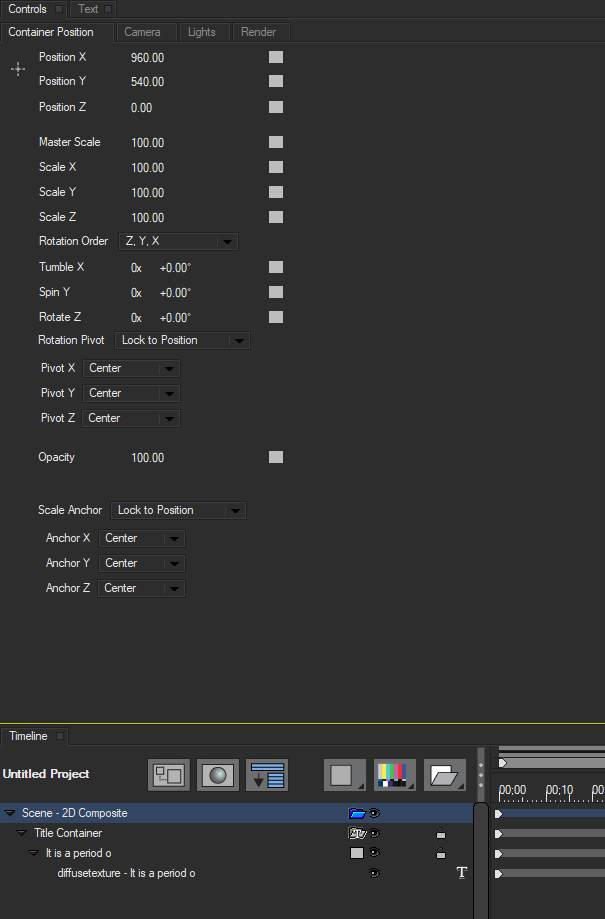
- If I select the Tumble X parameter, and adjust it to a value of -70 degrees, my text will take on the familiar angled crawl that began a long time ago in a galaxy far, far away.
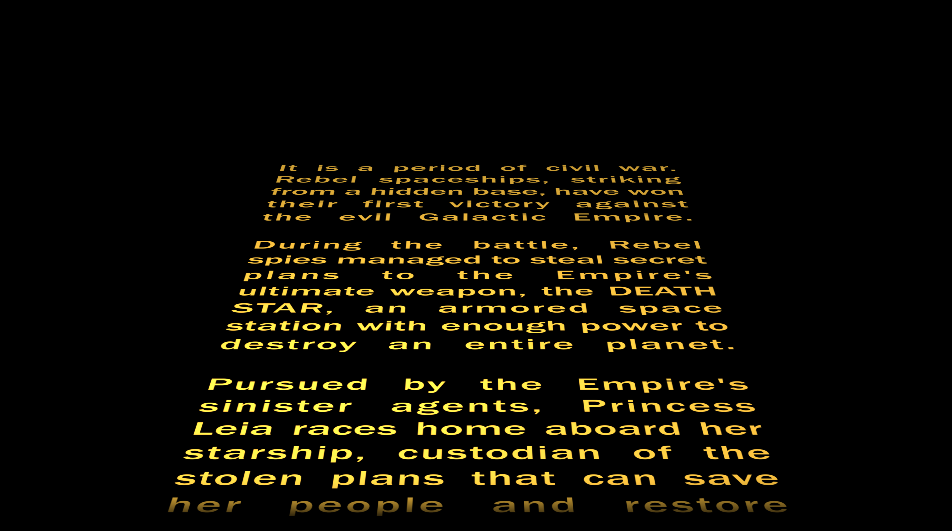
- Depending on the length of your text and how far you tumbled the 3D Container, you may need to tweak the start and end points of the roll to make sure that the text begins and ends in the right place.
Even with all the added details, you can see that we’ve got the same three steps with which I began: create text, put it in a Title container set to roll, and tumble the roll in a 3D Container. If I’m working in a host like After Effects, Media Composer or any OFX host, I can add a star field effect with Sapphire NightSky to really put the finishing touches on my effect.
All that’s needed now is a little of John Williams’ classic score, and that’s all there is to it!
Return to the Main Title Studio Page.
