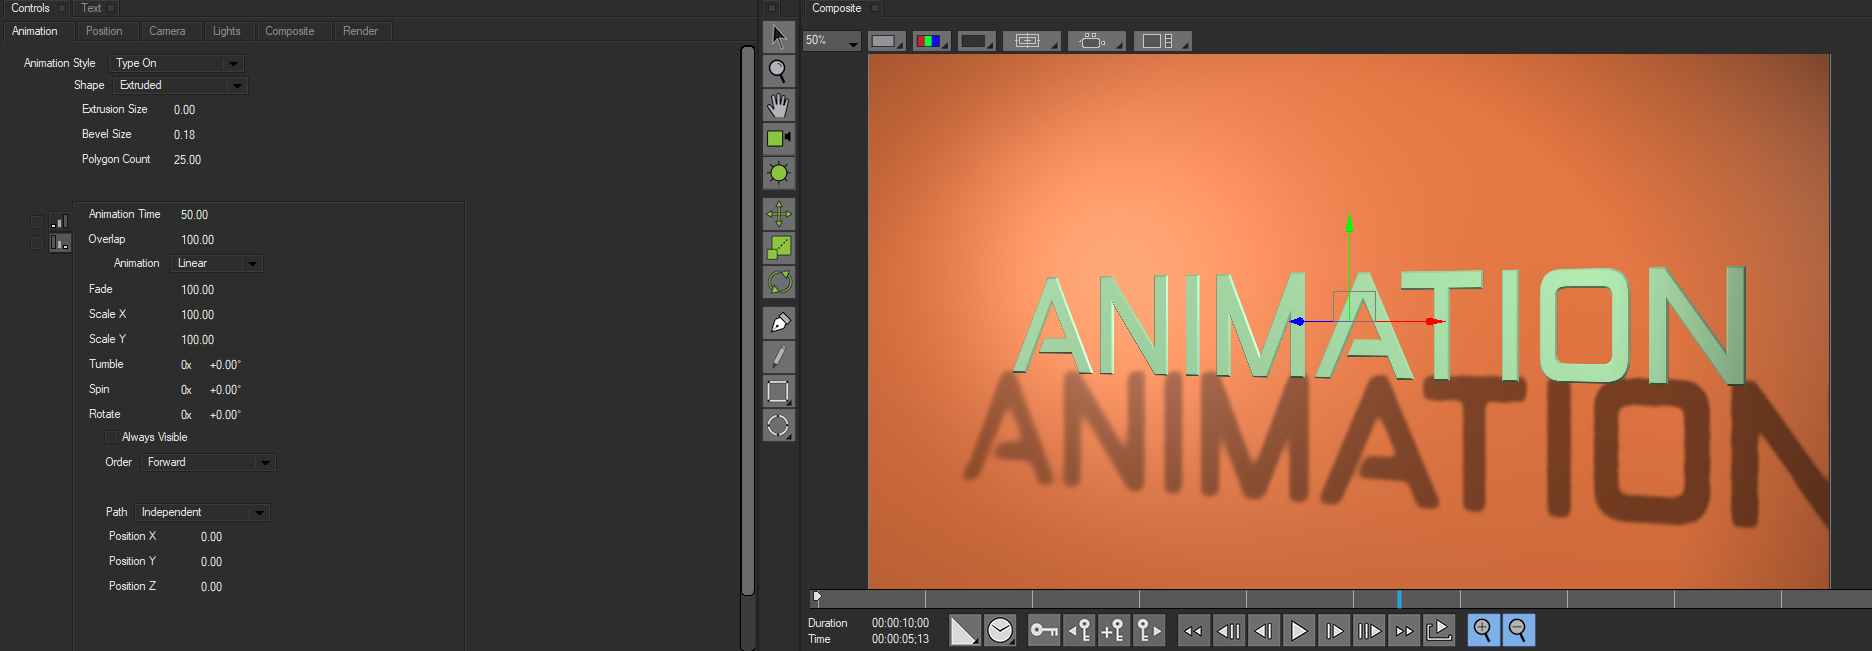
The Animation Tab contains context-specific controls for each type of animation available. It allows you to auto keyframe or manually adjust the settings for your title animation. Changes made to the parameters in the Animation Tab affect the effect as a whole, but do not change the individual object parameters in most cases. The exception to this is Type-On Animations, which have additional controls that directly affect the text object’s shape, extrusion and beveling. The tab becomes available only when the title container has been selected in the timeline. Once selected you can adjust you title animation settings.
From the Animation Style drop down menu, you can select the style of animation you would like to work with. All parameters are contextual and only parameters relevant to a specific animation will display.
NOTE: The Title Container’s position controls override the nested shape tracks’ own position controls. The title container automatically centers any track inside it, so any positioning you applied to a track before placing it in the container is lost. You can adjust a track’s position by using the Position settings in the Title Container.
Common Controls
While the available animation parameters are contextual, there are a number of parameters that are available to two or more animation styles. These parameters are helpful in controlling the speed, position and direction of the animation.
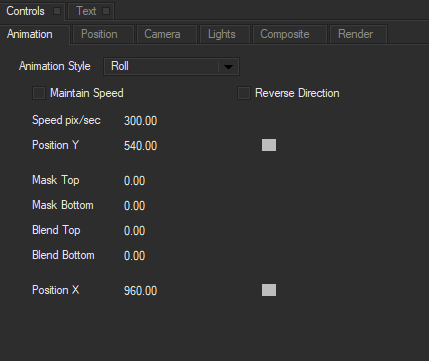
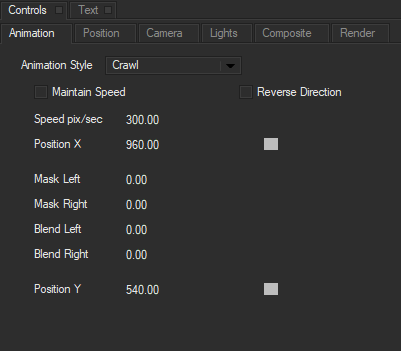
Maintain Speed allows you to manually set the speed of your animation. When the box is checked, use the Speed Pix/Second parameter to set the speed.
Reverse Direction reverses the direction of the animation, causing tracks to move from left to right instead of right to left; or top to bottom instead of bottom to top.
Speed Pix/Second adjusts the speed at which each track animates across the screen. It is calculated in pixels per second. Title Studio automatically adjusts the Speed to fit the number of tracks in the Title Container and the duration of the effect. NOTE: Speed has no affect if Maintain Speed is deselected.
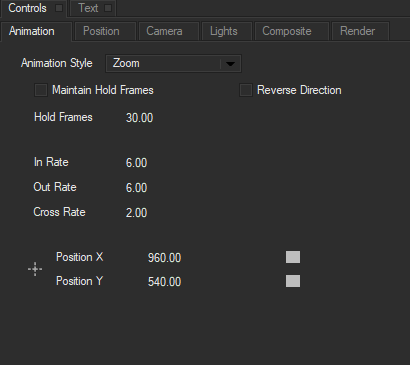
Position X and Position Y set the coordinates of the container’s center point. Depending on the type of animation selected, Title Studio will automatically sets keyframes for Position X or Y in the timeline to move each track across the screen. Manually adjust the position parameter to offset the titles upward or downward, left or right.
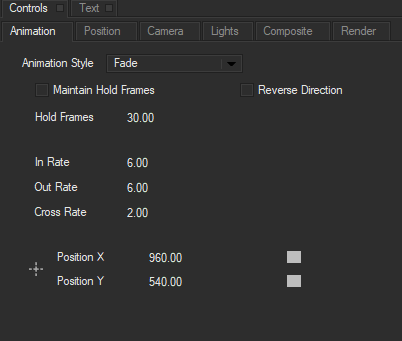
Maintain Hold Frames controls the number of frames each track remains fully opaque after it fades in. Depending on your Animation Style, Title Studio automatically adjusts the number of Hold Frames to fit the number of tracks in the Title Container and the duration of the effect.
Hold Frames allows you to manually select the number of Hold Frames in your animation. When the box is checked, use the Maintain Hold Frames parameter to set the duration.
In Rate sets the number of frames each track takes to animate in. For example, if the Animation Style is set to Fade, the In Rate will animate the track’s Opacity value from 0 to 100
Out Rate sets the number of frames each track takes to animate out. For example, if the Animation Style is set to Fade, the In Rate will animate the track’s Opacity value from 0 to 100
Cross Rate sets the number of frames each track overlaps the track following it. A value of 0 causes each track to animate out completely before the following track animates in. Increasing this value increases the number of frames in which the tracks overlap.
Roll Animation:
When you select the Title Container track in the timeline and set the Animation Style menu in the Animation tab to Roll, all tracks in the title container move up the screen in the order they appear in the container. You can use multiple tracks or create all the text in a single track.
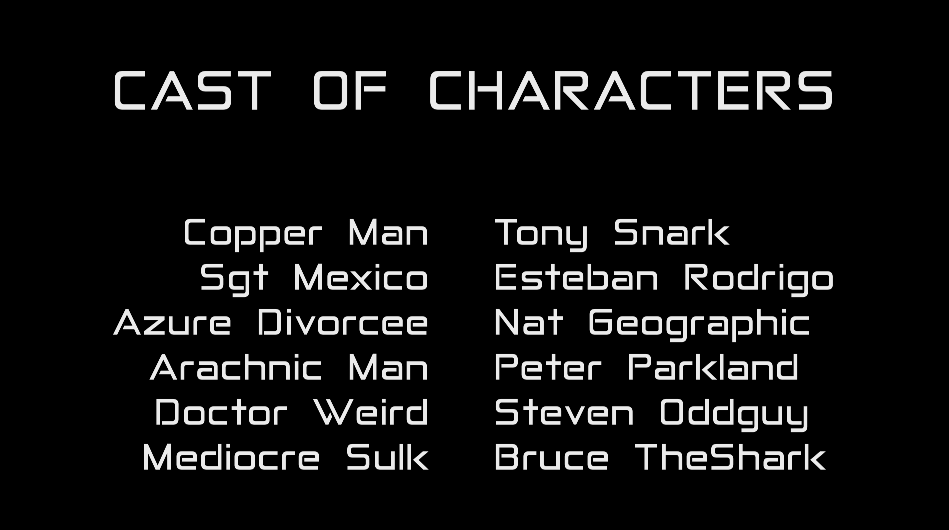
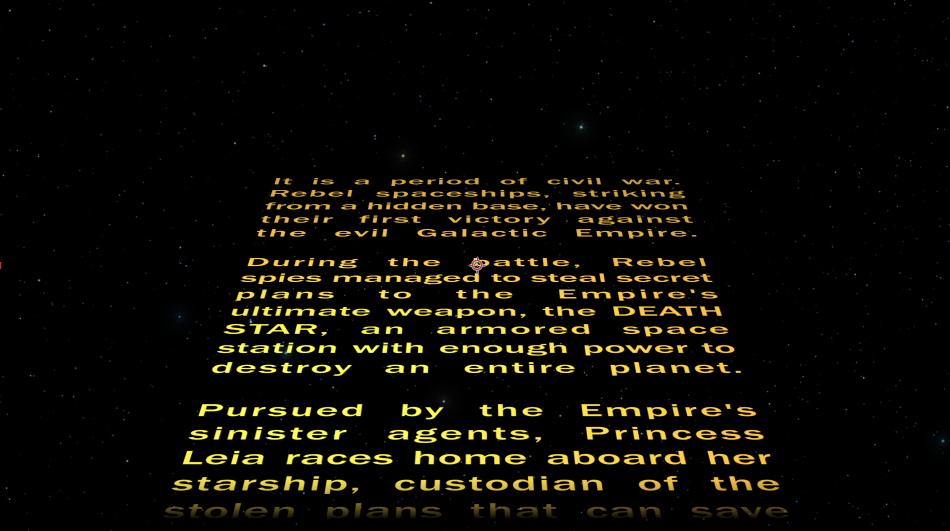
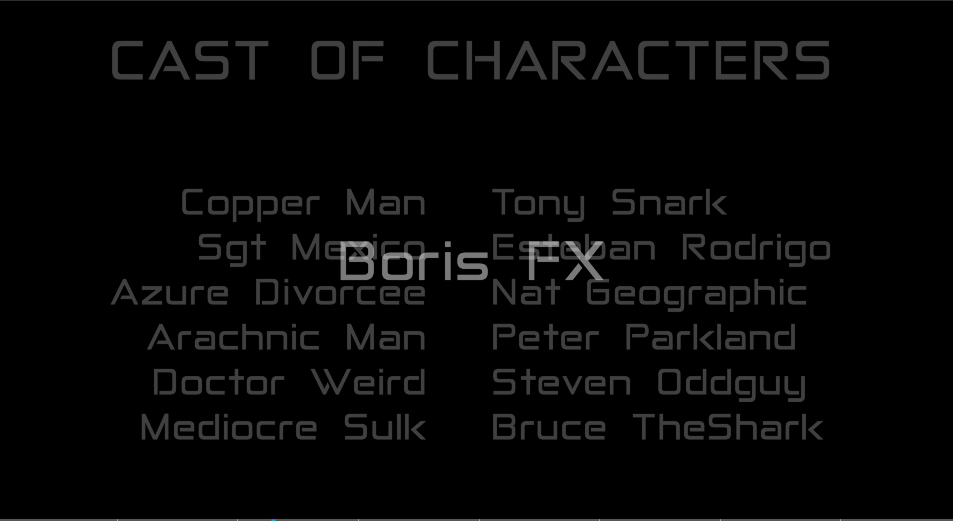
Rolls are typically used to create end credit animations, Star Wars-style opening scroll or other scrolling text. If you would like to learn how to create a credit roll in Title Studio, this tutorial may be helpful.
In addition to many of the common controls listed above, Roll Animations allow
Mask Top and Mask Bottom set the distance, in pixels, of masks at the top and bottom edges of the frame which hide the text as it rolls.
Blend Top and Blend Bottom soften the edges of the mask, causing titles to “fade” in and out of the masked region.
Crawl Animation:
When you select the Title Container track in the timeline and set the Animation Style menu in the Animation tab to Crawl, all tracks in the title container move across the screen in the order they appear in the container. You can use multiple tracks or create all the text in a single track.
Crawls are typically used to create lower third ticker annimations and other scrolling text.
In addition to many of the common controls listed above, unique parameters for Crawl Animations are:
Mask Left and Mask Right set the distance, in pixels, of masks at the left and right edges of the frame which hide the text as it rolls.
Blend Left and Blend Right soften the edges of the mask, causing titles to “fade” into and out of the masked region
Fade Animation:
When you select the Title Container track in the timeline and set the Animation Style menu in the Animation tab to Fade, all the tracks fade in and out in the order they appear in the Title Container. Adjusting the settings automatically keyframes Opacity in the text tracks, allowing you to easily control the duration of the fades.
Zoom Animation
When you select the Title Container track in the timeline and set the Animation Style menu in the Animation tab to Zoom, each track zooms in and out in the order it appears in the Title Container. Adjusting the settings in the Controls window automatically keyframes Scale in the text tracks, allowing you to easily control the duration of the zooms.
Shuffle Animation
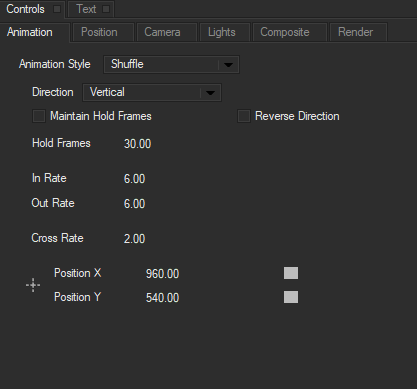
When you select the Title Container track in the timeline and set the Animation Style menu in the Animation tab to Shuffle, each track quickly moves onscreen (movement can be horizontal or vertical), remains stationary for an interval, and then quickly moves offscreen.
In addition to many of the common controls listed above, unique parameters to Shuffle Animations are:
Direction controls the motion of the tracks. Choose Horizontal to move tracks from left to right along the X axis, or Vertical to move tracks from top to bottom along the Y axis.
Type On Animation
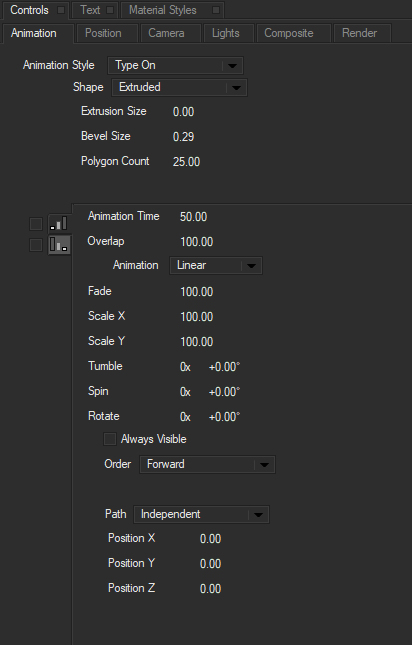
When you select the Title Container track in the timeline and set the Animation Style menu in the Animation tab to Type On, an animated “type-on” effect is created. This effect differs from the Type On effects created in the Type On tab because it is OpenGL-accelerated and allows you to animate characters in true 3D space. The parameters in this tab do not include interpolation fields. Instead, the animation is applied progressively using the settings in the Animation tab.
Shape allows you to select between flat and extruded text. It is important to note that unlike other animation styles, when Type On is selected, it automatically creates a default text that is split into a seperate track for each letter. While the text as a whole can be edited in the text generator window, it is recomended that you select the type on animation style first before editing any text, as doing so will override any pre-existing text.
When Extruded Text is selected, additional paramaters to adjust the extrusion become available
Extrusion Size controls the depth of the extrusion. Higher values will result in a deeper extrusion, lower values will result in a smaller extrusion.
Bevel Size controls the amount of beveling. Higher values will result in a more pronounced bevel, whereas lower values will result in more subtle beveling.
Polygon Count controls the amount of polygons in the 3D Object. Higher values will increase the number of polygons used to create the object giving it a smoother appearance, while lower values will decrease the number of polygons, creating a blocky look. Increasing the overall polygon count may increase render times.
Type On: This checkbox enables type on animation. Parameters in this section will not create an effect until the Type On checkbox is enabled.
Type Off: This checkbox enables type off animations. Parameters in this section will not create an effect until the Type Off checkbox is enabled.
Animation Time controls how long the text animates during the effect, expressed as a percentage. This parameter affects animations created with the Fade, Scale, Position, Tumble, Spin, and/or Rotate parameters (described in the following sections). For example, you create a ten second effect and select the Reveal tab checkbox to type on the text. Animation Time specifies the percentage of that ten seconds that the Fade, Scale, Position, Tumble, Spin, and/or Rotate lasts. If Animation Time is 50, the text animates for five seconds (50% of 10), and subsequently remains stationary for the rest of the effect. You can also adjust the animation time in the timeline. Simply drag the Reveal handle or Remove handle to increase or decrease the animation time.
Overlap sets the overlap between object animations. This value is set as a percentage. At a value of 100, each line finishes animating before the next line begins animating on or offscreen. At higher values, multiple elements animate at the same time.
Animation sets the type of interpolation used for the type-on parameters. The choices are as follows:
- Linear uses a constant speed, similar to the Linear interpolation type.
- Decelerate allows you to gradually decelerate the effect.
- Accelerate allows you to gradually accelerate the effect.
Fade allows you to gradually fade in successive characters. When Fade is set to 100, each character appears suddenly and is fully opaque. Decreasing this value creates a more gradual effect, in which each character fades on as its opacity increases.
Scale X and Scale Y adjusts the X and Y starting size of the characters . The default value is 100, in which the text types on the screen full size. If you decrease the value, the text appears to grow onscreen as it types.
Tumble, Spin and Rotate set the starting Tumble, Spin, and Rotate values for the characters in relation to their final Tumble, Spin, and Rotate values (controlled by the Letter Tumble, Letter Spin, and Letter Rotate values set in the Text Transformations tab and by the Tumble, Spin, and Rotate controls in the shape track’s Position tab). Each character animates from its starting Tumble, Spin, and Rotate values to its ending values as it appears on screen.
Always Visible forces all text characters to remain visible. When this checkbox is deselected, characters progressively appear or disappear from the frame. Selecting the Always Visible checkbox makes characters remain visible while the transformations are progressively applied. One way to think of this effect is like “the wave” that crowds perform at football stadiums; the transformation appear to pass through the page of text. The animatable parameters behaves as the center of the wave when this checkbox is enabled
Order allows you to control the order in which the text types on. The Order menu includes the following options:
- Forward types the text on from left to right.
- Reverse allows you to reverse the effect so that the text starts typing on from the right.
- Random types the text on randomly.
The Path menu allows you to map the text to a path. The Path menu includes the following options:
- Independent gives you the ability to use Position X, Position Y, and Position Z to set the coordinates of the title’s starting point. The title animates from the starting point to the middle on the screen.
- Single Emitter allows you to set a single point from which the text characters are typed on. Use Emitter X, Emitter Y, and Emitter Z to set the coordinates of the title’s starting point.
Animation Tutorials
Given the depth of options available for creating animated titles in Title Studio, we have created a number of tutorials that may be helpful to you.
Creating a Credit Roll: Part One
In this tutorial we will cover the basics of the Roll animation to create a simple End Title sequence
Creating a Credit Roll: Part Two
Building off the basics from Part One, we will use imported text files to recreate the classic opening to Star Wars.
In this easy tutorial we will explore how to auto animate text that fades on.
Return to The Title Container Parameter Guide.
Return to the Main Title Studio Page.
